Tuesday, January 28, 2014

Roasted Eggplant and Fennel Flatbread

It's really not much fun at all trying to get back on the wagon after the holidays, I must admit. I've been eating out a lot and not eating much that is good for me. However, times have got to change. So, even though I was starving when I left work, I resisted the temptation to eat something awful and came home to start working through some of the veggies left over from my Bountiful Basket. And I was so glad I did!
This is really a mutt of a dish. Italian-style roasted eggplant and fennel, Greek tzatziki, and Indian naan. Last weekend, I happened upon a new Indian grocery store near me. I got some paneer, lots of curry powders and other spices, and some fantastic-looking naan. I knew I'd never eat it all, so I put half in the freezer. For the other half, I had an eggplant and two fennel bulbs lurking in the fridge. Perfect!

I followed this recipe to make tzatziki sauce, which is a cucumber-dill-yogurt sauce. It's creamy, tart, and has a really fresh taste with the cucumber. Put in the fridge to chill after you've assembled it. The longer it sits, the more flavorful it will become.
Then get working on the eggplant because you have to drain it. Eggplant has a high water content, so you want to get rid of a lot of that water before cooking so it's not a mushy mess. Slice your eggplant up (I like thicker slices so they don't fall apart) and sprinkle both sides liberally with salt. Put them in a strainer to drain. Let them sit for as long as you can. I think I only gave mine about a half hour, but an hour would be better. To really get as much moisture out as I can, I put two paper towels on my cutting board, spread out my eggplant in a single layer, put two more paper towels over them, and then go over them with a rolling pin to squeeze out the liquid. While they were sitting in salt, I cut fennel.
I think in the future, I would have cut the fennel a bit thinner, but this was fine. I tossed in about 2 T. of olive oil, lots of black pepper, and a sprinkle of fancy pink salt.

When the eggplant was drained, I breaded it. I took about 1/2 cup of Italian seasoned breadcrumbs and mixed in 2 T. fresh grated parmesan cheese. I brushed each piece with olive oil, dredged it in the breadcrumbs on both sides, and placed them in a single layer on a baking sheet. I dumped the fennel next to the eggplant because I'm all for one-dish meals and shredded some parmesan cheese over it.
I baked this at 325 degrees for about twenty minutes, or until the fennel was done. Then I removed the fennel to a bowl, flipped the eggplant over, and cranked up the oven to 425 degrees until the eggplant had a nice crust.
When the eggplant was nearly done, I cut a piece of my lovely naan in half and put it in the oven to warm.
When the naan was warm, I put it on a plate and layered on two rounds of chopped eggplant, a hearty spoonful of fennel, and topped it with some tzatziki.
I have to admit, this little mutt of a dish turned out really well. I ate it with an orange I found in the fruit drawer, and this was really not a bad Tuesday evening light meal. And I have leftovers for tomorrow! I will totally do this again. Now, what to do with that spaghetti squash lurking in the crisper?

Wednesday, January 22, 2014

Eat the Grapefruit! All the Grapefruit!

My sister's darling husband is from a town in South Texas near the Texas/Mexico border. They have the best grapefruit in the world there. And, even better, they sell it before it's waxed and artificially colored for grocery stores. At Christmas, I asked my sister to bring me a bag o' grapefruit back. Be careful what you wish for because eighteen pounds is a lot of grapefruit.
Eighteen pounds of grapefruit.

So I got busy. Using a recipe from Canning for a New Generation, I made one million jars of grapefruit marmalade. Lest you have taken leave of your senses and fancy me some sort of kitchen goddess, let me disabuse you of this notion. My marmalade sucked. It was really bitter, and once I canned it, it didn't set up. Sigh. After glaring at it every time I opened the pantry door for about a week, I finally sucked it up, broke into all those jars, dumped it all back into a pot, and doctored it with brown sugar and pectin until it had no other choice but to submit. 
The ensuing mess after I decided to re-can all the marmalade.
But, it's better now. The bitterness seemed to have mellowed while it was in the pantry, it finally set up, and I hope we will live happily every after. It's a good thing because there's a lot of it.
On the day that I decided to re-can the marmalade, I decided to also re-do some especially poor watermelon jelly. It hadn't set well either, and honestly, it tasted like a watermelon that had lingered far too long in a dirty back alley. So I resolved to fix it. I opened all the cans, threw the crap jelly into a pot and added a bunch of good balsamic vinegar, a pinch of vanilla, and some more pectin. And guess what? Watermelon and balsamic FOR THE WIN. It was vastly improved, which is a good thing because it was about ten seconds from being poured down the sink. What's the saying? "Behind every good canner is a pantry full of crap that didn't turn out right," or something similar? It's certainly true for me. But the good thing about canned food, especially jelly, is that it's usually sturdy enough for a retry. 

Anyway, on with the grapefruit. I peeled what seemed like forty grapefruit and cut the peel into triangular sections. 
Using this recipe for candied grapefruit, I, well, candied the grapefruit, except that I use the mint sugar I made a couple of months ago for the end sugaring. It's so pretty!  
Dear God, there was still a lot of grapefruit left. Thank goodness I have a kick-ass grapefruit pie recipe, courtesy of my sister's mom-in-law. 
For the crust, use my Granny's recipe or a store-bought crust (Granny's is about one hundred times better, but we all get desperate from time to time). Now, for the filling. My sister's m-i-l uses room temp cream cheese. I like the cream cheese whipped with goat cheese, brown sugar, and some fresh vanilla bean. However, this time, I was really on a mission to clean out my fridge, I didn't have any cream cheese, and I was not down for a trip to the store. I had 2/3 of a container of Cool Whip and one small container of plain Greek yogurt that needed using. So I whisked them together with some brown sugar and vanilla. IT WAS A MIRACLE IN MY MOUTH. For the grapefruit layer, I made a variation of my fruit compote, which is really more of a jelly for this recipe. I sectioned out two grapefruit, just like I do when I eat them for breakfast (cut them in half, cut all the way around as near to the pith as possible, and then on either side of each section membrane, and scoop them out with a spoon). Put the grapefruit  to strain over a bowl, collecting the juices. The juice makes the basis for the "compote" or sauce. For this one, I used the grapefruit juice, white wine, a bit of water, honey, brown sugar, a pinch of salt, and saffron. With this sort of sauce, you just have to keep tasting it until you like it.

While the sauce was reducing down a bit at a gentle simmer, I dissolved one and a half packages of gelatin into about 5 T. of cold water. When I was satisfied with the sauce, I added the gelatin and took it off the heat.

Now, bake your pie crust until it's done, as you won't be cooking this pie. Use pie weights or beans in the crust to keep it from getting giant bubbles in it. When it has cooled and your sauce is now room temperature, you can layer in your creamy filling (about halfway up). Evenly distribute your grapefruit chunks on top of the cream filling. Pour the sauce over the grapefruit and immediately place the pie in the freezer for ten minutes. You want the gelatin to set up fast so your crust doesn't get soggy. After ten minutes, move the pie to the refrigerator and keep it there until it completely sets. Enjoy!

Now, while I liked the Cool Whip/yogurt mix better taste-wise, I did find that it made for a less attractive pie. Bits and pieces of it broke off and floated to the top, which marred the pretty pink surface of the gelled sauce a bit. The cream cheese/goat cheese later is heavier and does not do this. Luckily, this is not a recipe that you have to strictly adhere to (like the ratios for baking a cake), so you can experiment a bit.

Recipe after the break...

Sunday, January 19, 2014

OhFeelYa's Easy...Dinners--Roasted Chicken, Broccoflower, and Potatoes Au Gratin

Since my daughter totally conned me into Taco Cabana last night on the way home from roller derby practice, I decided tonight was a good night for a well-balanced, easy dinner so I wouldn't lose my mom card. I had a fantastic whole chicken from Rehoboth Ranch that I bought at the Carrollton Farmer's Market over the weekend. (Please check out the linked website. Rehoboth's commitment to healthy, sustainable farming is remarkable. For example, they didn't have any eggs at the farmer's market this time because they refuse to artificially stimulate the hens into laying more than they naturally do this time of year.) I was really excited to try out this little hen and see if I could discern a difference between it and store-bought poultry.
I wanted my chicken to be really juicy and flavorful with minimum effort, so around lunch time I put the chicken in a brine in the fridge. Salted brine is a great way to always get toothsome results. For my brine, I added 1/2 cup kosher salt, 1/3 cup brown sugar, 6 lightly crushed peppercorns, and 4 chopped juniper berries to 8 cups of water. Warm it up and stir until the salt and sugar completely dissolve.

Brine. The best friend of a girl and her chicken.
When your brine is cooled to room temperature, submerge your chicken. A baggie works best, but a pot with a lid will work too. I put my chicken into a gallon-sized baggie, filled it with brine, and put it into a pot to refrigerate until it was time to cook (you don't want your raw-chicken brine leaking all over the fridge). Let your chicken soak at least 3-4 hours. You can let it soak overnight if that works better with your schedule.


When you're ready to cook, take your chicken out of the brine and rinse it off. I seasoned it all over with salt, pepper, and some vegetable oil and put it on a roasting rack. Nothing fancy. I have a turkey roasting rack from ChefMate that I love because instead of just using it once a year to roast a turkey, it can do double duty the rest of the year as well. 
I got a funny broccoflower at Central Market to roast as well. I mixed about 2 T. of oil with a 1/2 t. of smoked salt (my new favorite find!), some nutmeg, black pepper, and a bit of thyme and tossed the broccoflower in it. I put it in foil to keep it separate from the chicken and roasted both at 375 for about an hour. Check the broccoflower every twenty minutes or so. You want it to brown but not go to mush.

I had some potatoes in the pantry about to start sprouting and a half bag of shredded cheddar cheese in the dairy drawer, so potatoes au gratin were born.
I peeled and thin sliced the potatoes (about 1/8 inch) and layered them with just a sprinkle of cheese and garlic salt. You can add finely diced garlic in each layer for extra flavor as well.When I was done, I poured lowfat milk about 1/3 of the way up the pan and topped the gratin with a sprinkle of cheese. You could mix the cheese with seasoned bread crumbs if you wish. This went in the oven as well, but it can take longer than the chicken to cook, so you might start it before the chicken.

I really love these kinds of recipes because they're versatile. Instead of a chicken, you could do a turkey breast or a game bird. Just know that birds with bones and skin are always going to be more flavorful and interesting than boneless, skinless breasts. Instead of broccoflower, you can do broccoli, cauliflower, brussel sprouts, etc.... You can use any kind of cheese in the gratin that is lurking in your cheese drawer needing to be used up. Parmesan, gouda, or swiss are great in gratin as well. Or, you can use sweet potatoes and omit the cheese if you want. (Add garlic, herbs, and chicken stock instead.) When my family makes this for the holidays, we pile on the butter in each layer and use cream. This, however, is not practical for everyday eating, so I use small sprinkles of cheese and lowfat milk for a more healthful version. I love the crust this makes on and around the potatoes. Make this in your favorite cast-iron skillet for extra crust.

You may have to peek in and cover your chicken breast with foil when it begins to brown to keep it from blackening (I was busy and threw foil over mine before it was really ready. Sad, sad loss of extra-crunchy skin.) You want your breast temp to be at 160 degrees when you take it out. Let it rest for at least ten minutes before slicing.
My husband's potato-heavy plate. I think he added another slice of chicken and a leg after I snapped this shot. 
All told, this meal took maybe 30 minutes of prep and an hour and a half to cook (and the cooking time is largely unsupervised, so you can throw in a load of laundry, help kids with homework, take the fur kids for a quick zip around the block, do whatever you need to do). If you make your brine the night before or in the morning, you can put your chicken in it before work, and throw it all in the oven when you get home. The leftovers were good too, and the brined, fresh chicken from the farm was a WIN.

NOTE: Don't throw out that chicken carcass! It will make a good amount of chicken broth that you can freeze or can, and good chicken broth is expensive at the store (as well as having tons of sodium and other chemicals). This is free! The next day, put your chicken carcass in about a gallon or so of filtered water. Bring it to a low simmer and let it simmer gently for about four hours. Don't add salt (it will cook down and get too salty). Don't bring to a rolling boil (that makes for cloudy stock). You can add aromatics (celery, carrots, etc...) if you like, but lazy girl broth of chicken and water works fine too. When it's done, run it through a fine strainer and cool to room temp. Skim off as much fat as you can (if you have the time and fridge space, you can refrigerate it overnight so all the fat rises to the top and solidifies, and then you can really remove a lot of it), and either head for the pressure canner for shelf-stable stock or ladle it into ziplock baggies for the freezer. If you freeze it, make sure you label the bags before filling and lay them flat for freezing so they're more manageable. I've also started keeping an index card on the freezer door with a list of what I've got frozen in there. It helps me to plan meals and use up what's there, not make excess, and to keep a tally of what I need more of. You can throw used-up cards in a drawer to take out next year and see what your family ate a lot of and what you would up throwing out a year later so you know what to make (or not make) in the future.
My one little chicken carcass made five quarts of broth. 
Recipes follow:

Thursday, January 9, 2014

Make Your Own Sourdough Starter!

Meet my new pet, The Kneady Bastard. He's a typical man, just needs to be fed and have a warm spot to be stinky in.

I was talking to a fellow book lover the other day about Anthony Bourdain's lauded Kitchen Confidential and how I always break into a fit of giggles over the bread scene. Evidently, at one point, Bourdain has a bread savant working for him. However, this gentleman was also a drug addict and low-level criminal who would frequently call into work. Bourdain reports this employee calling the restaurant in hysterics about his enormous starter, shrieking into the phone, "FEED THE BITCH! FEED HER OR SHE'LL DIE!" I really wanted a starter pretty much so I could make similar phone calls to my husband. However, in the interest of both feminism and not plagiarizing, I couldn't go with anything with b@#$% in the title. Hence, The Kneady Bastard was born.
Last week, I picked up a copy of Mother Earth News because of the fabulous sourdough spread on the cover and the promised sourdough miracles lurking therein. However, I discovered that, like most recipes for sourdough bread, the authors want you use your existing sourdough starter or to order one online, reconstitute it, and then proceed. As an instant gratification girl, I found this to be total crap. What if I want to, well, start a starter? I scoured several good cookbooks on my shelf, particularly the DIY kitchen books. No luck. No starter recipes? Is this a conspiracy? Finally, I found one in an old edition of Bread Machine Magic. And guess what? It's not hard. So why do so many recipes leave it out and direct you to BUYING a starter?

That's some silliness, in my opinion. Out of curiosity, I looked into what purchasing a starter entails. They range from $9-$50 and come with all sorts of unnecessary equipment. To get started, all you need is a cup of warm skim milk (90-100 degrees), three tablespoons of plain, active yogurt, a cup of bread flour, and a glass jar. A starter is just a liquid-ish piece of dough that is well into the fermentation process and adds the sour flavor and extra air bubbles to the bread.
Warm the milk (if you don't have a thermometer to measure the temp with, it took about a 45 seconds in my microwave). Stir in the yogurt. Don't seal the jar (you want the gases to be able to escape), and put it in a warm place for 24 hours until it thickens a bit and you can see some small curd when you slosh it around.
Notice I took the orange sealing ring out of the lid so the jar wouldn't be air tight.
Then stir in your cup of bread flour and return the jar to a warm spot. Stir it once a day until it has air bubbles and smells like sourdough.
It will produce some clear or light yellow liquid on the top; don't worry, just stir it back in. The author of my bread machine book does advise you to discard your starter right away if it gets fuzzy, black, green, orange, or pink. Good call. A starter is good because you can do a whole lot of things with it from muffins to pancakes to many forms of bread. I decided to go with a no-knead recipe that was in the Mother Earth News. I combined the suggested 3 1/2 cups flour, 1/4 t. active dry yeast, and salt. Then I added in 2/3 cup of Kneady Bastard and 1 1/2 cups of water. Combine well, cover, and let it sit for 12-18 hours. Then, plop it out on a flour-sprinkled, wooden cutting board, cover with a clean tea towel, and let it sit for another hour or two. All this letting it sit is taking the place of kneading in this recipe.
Dough in the pot (Dutch Oven, sort of. My enameled Dutch Oven is giant--to big for a bread loaf). 
Thirty minutes before the last rise is complete, put a Dutch oven into the oven and preheat it to 450 degrees. When your pot is quite hot (the recipe advises using an oval-shaped Dutch oven, but I don't have one. Round worked just fine), sprinkle the bottom with some corn meal. Using two spatulas, fold your dough ball in half a few times to combine it one last time and get it into a ball. Dump it in the hot pot, sprinkle with corn meal, put the lid on it, and bake for 35 minutes. When 35 minutes has elapsed, remove the lid and return to oven until the crust is browned, about ten minutes.
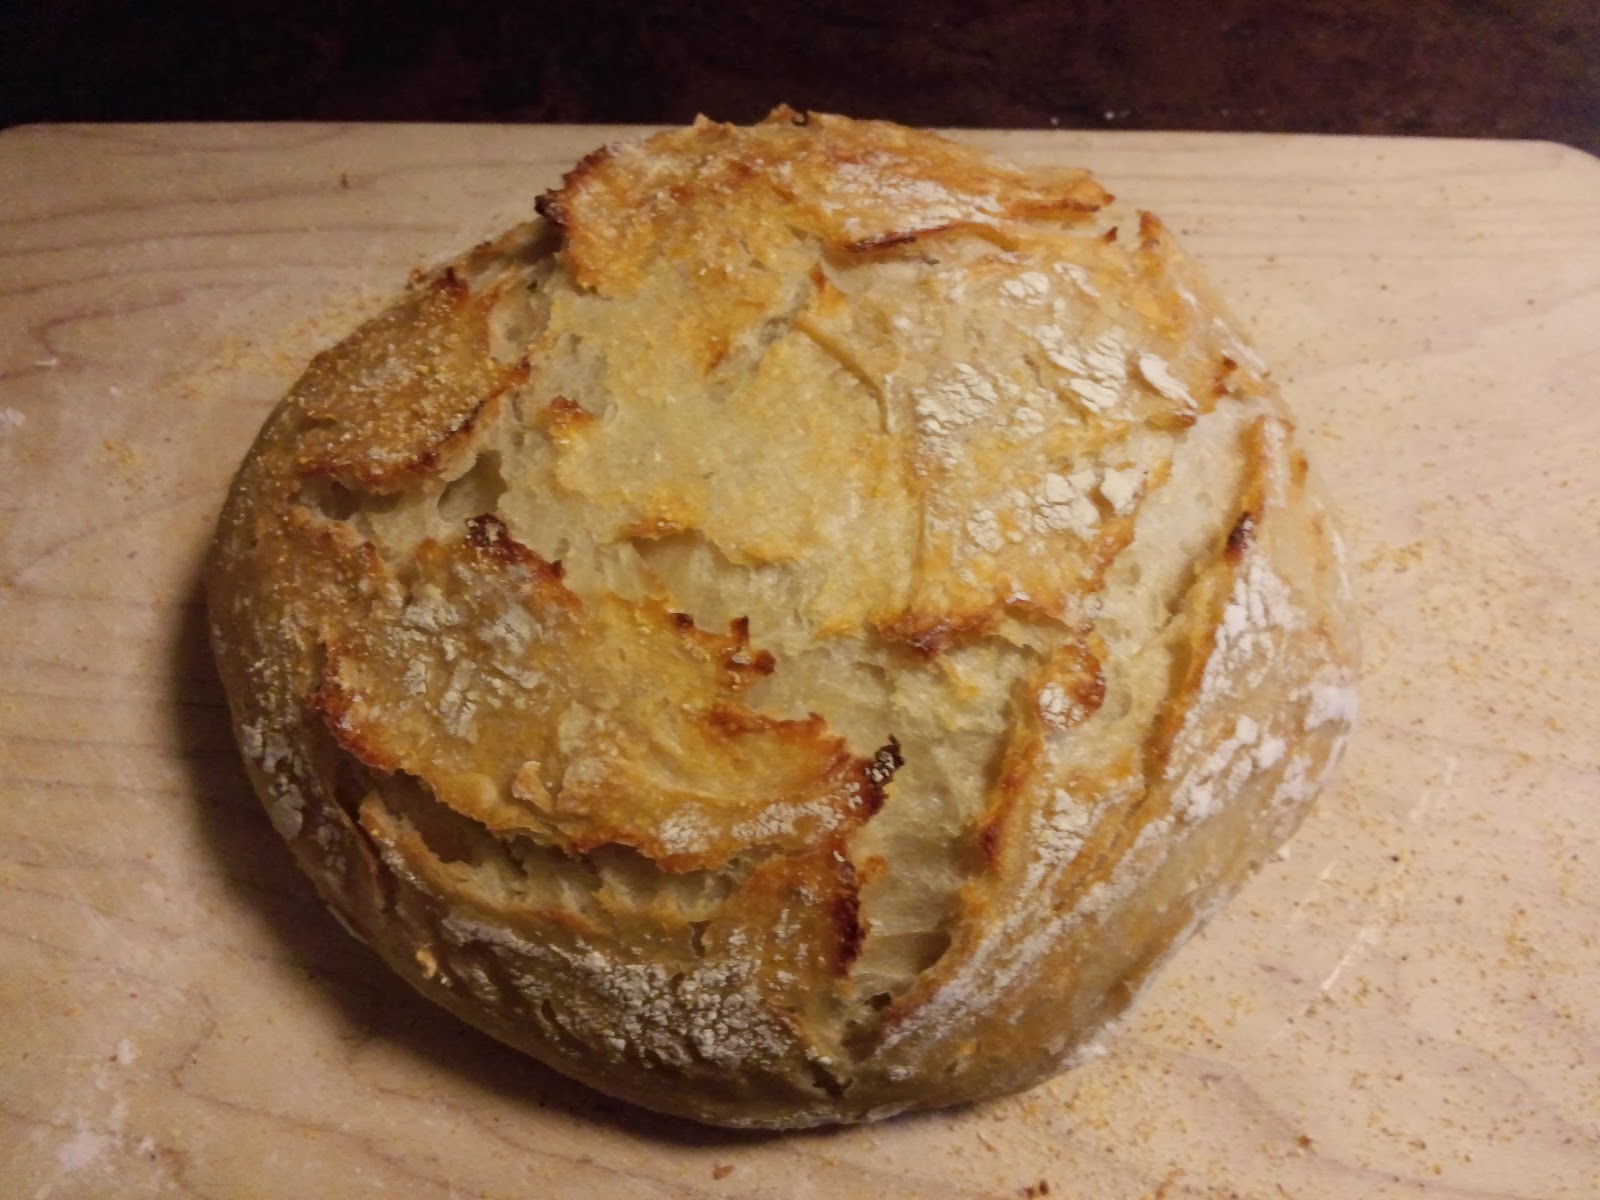
This turned out quite well! From starting the starter to produced loaf of bread took about five days. However, once your starter is going, it only takes a day to produce a loaf with the rise times. When you remove part of the starter, you have to feed it to replenish. I took 2/3 of a cup from The Kneady Bastard, so I had to feed him 2/3 cup of milk and 2/3 cup of flour. I used bread flour and skim milk. He's a happy, stinky man.

Simplified recipes to follow:

Tuesday, January 7, 2014

Homemade Taquitos and Lizano!

On my way to the store today, I asked my kiddo if there was anything she wanted me to pick up for her. This is generally a fruitless question, with an eloquent, pre-teenesque shoulder shrug as her standard response. However, today, she looked up from a trashy romance novel she'd scored out of my office and replied "taquitos, please." 

I got to thinking on this selection. I really hate buying much in a box anymore (I've almost got my fridge, freezer, and pantry pared down to staples, fresh foods, and things I've canned myself), and I really hate feeding it to my girl child. So I thought, "Why can't I just make these myself?" I'm all inspired right now by Alana Chernila's cookbook, The Homemade Pantry. She offers suggestions on how to replace many staples with homemade items, so that's where my train of thought is right now. So off I went. 

First, I bought a small round roast, seasoned it with salt and pepper, and seared it off. My usual SOP for this type of meat. I deglazed the pan with red wine, added some beef stock (really I added some Better than Bullion and water) and lots of Mexican-ish spices like cumin, smoked paprika, regular paprika, and chili powder. When the roast was about 2/3 submerged, I put it in a 350 degree oven for about an hour and a half and then lowered the temp to the 300 degrees and let it cook for about another hour and half until tender. When it was ready, I let it cool and then shredded the meat with two forks.

I ran my knife through this pile, drizzled it with its own juice from the pot, and added more smoked paprika and cumin. Then came the hard part. I used corn tortillas and tried rolling them. This does not work with cold tortillas. I now have a baggie of utterly destroyed corn tortillas in my freezer that I'll throw in something with enchilada sauce and over-medium eggs. I tried a couple of things, but my favorite result came from getting out a small skillet and warming each tortilla in about a tablespoon of the liquid from the beef. Then I added the meat and rolled them up. If that's a bit too labor intensive, wrap your stack of tortillas in a clean, wet kitchen towel or paper towels and microwave to steam and moisten them. I may try making my own tortillas next time. 

Anyway, once they were rolled, I brushed them with canola oil and sprinkled sea salt on them. I baked them at 325 degrees just until they were really warm and started to brown. I didn't want them to get too crunchy and dry. 

While they aren't as tidy looking as the store-bought variety, they were tasty and better for us. And, they were smokin' with some Lizano sauce I brought home from my trip to Costa Rica last September.

Zip lining in Monteverde, Costa Rica. 


Sunday, January 5, 2014

Raspberry-Goat Cheese Galette and Granny's Pie Crust

Hmmm. Now, I will admit to having zero training as a chef or other food person, but it seems to me that "galette" is very pretty French for "messy pie." But I'm down to try anything, and honestly, I think the rusticity is quite fetching. So after Christmas, as we finished the pumpkin pie, the pecan pie, the cranberry pudding, etc...I decided not to let dessert die just yet. And there was leftover frosting from the jury-rigged cinnamon rolls I'd made the day before languishing in the fridge.
The day before, my daughter had woken up absolutely desolate that we were out of cinnamon rolls and orange danish. BUT, there was a roll of Grands biscuits, so I rolled them out flat, sprinkled them with cinnamon and sugar, re-rolled them up, and made frosting from cream cheese, vanilla, and confectioner's sugar. They were...okay. I'd be willing to improve upon that particular recipe, but it worked in a pinch. I'm sort of dying to know what sort of emergency meals you cobble together for yourselves or your children. Is anyone out there? I feel sort of like this is the point that my students get to when they start leaving me notes in the middle of their essays to see whether I'm really reading them or not.

Anyway, so I had a decent amount of frosting left, some delectable goat cheese from Latte Da Dairy (the goddesses of all things goat-ish) that needed using, and I'd gotten two pints of raspberries from the store. Rad. 

It seems to me that for a galette, you need a rocking crust. Fortunately, I happen to have just such a thing in my repertoire courtesy of Granny Pauline, bequeather of the purple velvet couch.

An aside here. I hope you all have something special to remind you of dear ones no longer living. The person I miss the most every day is my dad's mom. Granny was a schoolteacher and my best friend through middle school on. She gave me my first job (dismantling and cleaning her dining room chandelier, among other things). She had an attic full of the coolest stuff ever. When I got my driver's license, I went to her house at least a couple of times a week for visits. I confided in her like she was a peer, and some of the teenage secrets I told her must have made her toes curl at times. However, she would just sit, on a bar stool at the tiled bar in her kitchen, spooning hot cocoa and prunes out of a giant Campbell's soup bowl/mug, and listen intently. She never ratted me out, never judged me. And she made me fried chicken and butterscotch cake for my birthday and served it on her good china in her formal dining room. She died when my daughter was less than a year old. I inherited her recipe box as a remembrance of the time spent in her kitchen, and it's one of my most treasured possessions.

I guess I'm telling you this because I want you to get that it's a big deal to me to share Granny's pie crust recipe with you. One of the first things she taught me to make was apple pie, and this is her recipe. Please love it and share it with folks you love.  

In a large bowl, combine 4 cups flour, 2 t. salt, 1 T. sugar, and  1 3/4 cups shortening (I like to use butter-flavored Crisco). Work the shortening into the dry mix until it's in small pea-sized shapes uniformly throughout the flour. You can do this in a food processor as well. In a small bowl, combine 1/2 cup cold water, 1 t. apple cider vinegar, and one egg. Work the wet and dry mixes together until they're fairly smooth, but don't overwork. Separate into two balls, cover, and refrigerate for about a half hour before using. This crust recipe is meant to make the top and bottom of two standard-sized apple pies. I halved it for the galette.
Using half of the raspberries, I made the compote from one of my previous posts and added an extra teaspoon of corn starch to make it almost jelly-thick. Roll out the dough into a rough circle. Spread the cream cheese/goat cheese mix in a circle. Add your cooled compote. Carefully fold over the edges of your dough so it naturally makes creases. Add the rest of the raspberries on top of your compote and drizzle with some good honey. Brush the crust with cold water or an egg wash. Bake at 325 degrees for about 40 minutes or until the crust is done throughout.
Though I think I would roll the crust out just a bit thinner, I quite liked this with a bit of vanilla-bean ice cream on top.

Granny's pie crust recipe follows...

Wednesday, January 1, 2014

Food Narratives--Books You'll Love!

I'm a compulsive reader. I have been since childhood. I can remember my mother having to repeatedly tell me that it was bad manners to bring a book to the dinner table. I have a book stand in my bathroom so I can read as I blow dry my hair. I have a Kindle and a Kindle app on every electronic device I own so I can read at stop lights, in line at the grocery store, etc.... It's a sickness, I know. And it is my very good fortune that my two great loves, reading and cooking, intersect at the glorious genre of the culinary narrative.

So I thought I'd do a little book review for you all, if you have a hankering for something delicious to read. (That was a cheesy, I know.)

  • The book at the top of the stack was a gift from a dear friend. The Hundred Foot Journey by Richard Morais is a novel about an Indian boy in England who is a natural-born chef. It's evidently been made into a movie as well, but I haven't seen it. I love the language of this book, and it adds another layer to the story of English and Indian fusion both in food and in life. 
  • Jacques Pepin's The Apprentice is Pepin's wonderful memoir of his childhood and journey into the kitchen. It's such a light read, but you wind up with a deeper knowledge of the professional kitchen. It's like Anthony Bourdain without the swearing. 
  • Blood, Bones, and Butter is one of the first culinary memoirs I ever read. Gabrielle Hamilton's memoir chronicles her way to the kitchen in grittiest, dirtiest manner possible. Her writing style is very honest and stark and reminds me a bit of Annie Proulx. If Proulx had ever been regularly on the wrong side of the law and an on-again, off-again lesbian. 
  • I have to say it. I hated Julie Powell's Julie and Julia. I loved the film version but did not enjoy the book, which was a startling first for me. The cobbling together of the two women's lives feels more jarring in the book than it did on the big screen, and I didn't find Powell's character very sympathetic in the novel. However, I LOVE the blog she wrote as she cooked her way through Child's most famous cookbook, Mastering the Art of French Cooking. Anyway, because of that film, I fell in love with all things Julia Child, and My Life in France (largely authored by Child's nephew) is a delightful chronicle of Child's life, travels, and experiences.  
  • My Berlin Kitchen, by Louisa Weiss, is the story of Weiss's struggle having grown up divided between her father in America and her mother in Germany. As a young adult, Weiss struggles with her identity, and her expressive writing style allows readers to see both the allure and shortcomings of both parents and locales. The best part is that each chapter ends with a recipe mentioned in that chapter. Most are of German origin, and they all look quite good. 
  • I picked up Kathleen Flinn's The Kitchen Counter Cooking School: How a Few Simple Lessons Transformed Nine Culinary Novices into Fearless Home Cooks on a clearance shelf somewhere. This is a wonderful book for people who already love to cook, but I think it would be fantastic for the person who wishes they could cook but just doesn't know where to start. Flinn's cooking school begins when she's at the store one day and meets a woman who has no idea how to feed her family anything but processed foods. Flinn gives her a bit of advice and wonders how many other people need a bit of help getting started in the kitchen. Each of her students is profiled as Flinn investigates their kitchens and eating habits, and each chapter covers a kitchen "lesson" where the students learn kitchen skills. The chapters conclude with the recipes discussed in that chapter. 
This is a snapshot of similar books I've picked up but not yet read.

  • Michael Ruhlman's The Reach of a Chef and The Soul of a Chef are in my stack of much-anticipated reading. Ruhlman is a legend in the culinary world. He started out as a journalist who goes to culinary school so he can write about what it takes to become a chef and then goes on to become an integral part of the culinary community. And Bourdain loves him, so I'm in. 
  • The last one, The Scavenger's Guide to Haute Cuisine by Steven Rinella, is about Rinella's year-long hunt for each ultra-decadent ingredient in Escoffier's famed 1903 forty-five course meal. Sounds pretty outrageous, and Rinella is an excellent reporter.
  • Please don't mind my adult beverage or the lovely, low-brow reading at the bottom of the stack. My brain is still on post-dissertation strike. 
I'm always up for suggestions, so what food-related tomes have you read or at least given a passing thought to reading?