Monday, November 25, 2013

"The Best Green Beans I've Ever Had." With Bacon.

I have to tell the truth. My sister is a better cook than I am. Her experiments actually turn out well the majority of the time, whereas mine, I must admit, are often zany with mixed results. So, I thought I would invite her to do a guest post on a Thanksgiving favorite at our dinner table. So, without further ado, my baby sister, Kari's, green bean bundles. They are full of win. And brown sugar.
Image courtesy of Jay Jacobson from Kinetic.org
From the kitchen of Roxie (Kari's derby name is Dirrty on the Rox, and Roxie has just stuck):
Apparently bacon wrapped ANYthing will make you famous amongst friends. Bacon wrapped jalepenos, bacon wrapped pork tenderloin, bacon wrapped scallops... I found this delicious green bean bundle recipe on Williams Sonoma and have tweaked it to make it perfect for me. It's so simple (no extraordinary ingredients or cooking techniques) and is not too time consuming. The time it does take up is TOTALLY worth it because everyone will go crazy over these bad boys. There are a few things I've learned serving this dish: They aren't the greatest leftovers, but don't worry, you won't have any left over! Save the bacon grease for future recipes or use to cook the green beans. You cannot have too much bacon grease. Serve the sugary, garlicy, buttery juice from the pan, just do it. It is great on mashed potatoes or sopped up with yeast rolls. You will be surprised with the different ways your guests will use it. This recipe should be titled "best green beans I've ever had."

Wrapped with a strip of bacon, these green bean bundles add an elegant touch to the Thanksgiving table. To get a head start, you can trim and blanch the beans a day in advance, then store in an airtight container in the refrigerator.

Bacon Wrapped Green Bean Bundles
Ingredients:
8 thick bacon slices, peppered bacon preferred.  If desired, cook a few extra bacon slices to crumble over bundles when finished cooking
7 T. (3/4 stick) unsalted butter, melted
1  1/2 tsp. kosher salt
1 tsp cracked pepper
3/4 tsp. roasted garlic powder
2 garlic cloves minced
1 1/2 lb. green beans, trimmed and blanched (trim, rinse, place in boiling water for 1 min, strain, shock in ice water)
1/4 cup firmly packed light brown sugar
Tooth picks
9x13 baking dish or cookie sheet

Directions:
Preheat oven to 350 degrees.

In a large nonstick fry pan over medium heat, cook the bacon in batches until the slices are just beginning to brown along the edges but are still very underdone and pliable.  Transfer to a paper towel-lined plate and let cool, then cut each slice in half to make two smaller bacon slices.  Reserve bacon grease.

In a small bowl, melt butter.  Then add salt, pepper, garlic powder and minced garlic cloves.  Whisk until combined. 

Melt one T. butter in 9x13 baking dish.  Add about 2 T. reserved bacon grease.

Gather about 6 green beans into a neat bunch and wrap a half slice of bacon around the center, toothpick through the center to hold or roll the bunch so that the bacon ends are down to hold the beans together.  Place the bundles on the prepared baking sheet or dish.  Sprinkle the brown sugar evenly over the bundles and drizzle with the butter mixture.

Roast until the bacon is cooked through and browned, 20 to 25 minutes. Let stand for 3 to 5 minutes. Transfer the green bean bundles to a warmed platter and serve immediately.  Pour juice into a ramekin or small serving bowl to serve alongside the bundles.  Serves 8 to 10.

Adapted from Williams-Sonoma Kitchen's Green Bean Bundles with Bacon and Brown Sugar

I will update this with pictures from the big day!! Happy eating, my friends!

Sunday, November 24, 2013

Thanksgiving, Handled. Funnies, Links, and Recipes

The countdown begins. If you're like me, you're feverishly trying to figure out how you'll get everything together by Thursday. I did score with my Bountiful Basket and a visit to the White Rock Farmer's market yesterday, and I'll post about those soon. But for now, we all need to get our s#@! together for Thursday. 
I told you I was anti-stuffing. Happy Thanksgiving!!
  •  Bread. We never seem to get this quite right at my house, as it's always an afterthought. This year, I'm determined to do better and was thinking I might try Happy Bread. I would love to try the actual recipe, but in light of all the cooking I'll already be doing, I thought I might try this with store-bought croissant rolls. I know, I know. But I'm trying to be realistic here. 
    Happy Bread via Foodiva's Kitchen.
  • Looking for something new to add to the family's repertoire? Try these Crispy Polenta Chips with parmesan and sage. 
  • My favorite Butternut Squash Soup. The juniper-infused cream MAKES this soup. You can make it all the day before and then just reheat it and have an elegant starter to your dinner. This would also work well with pumpkin puree.
  • Another variation on cranberry--Spiced Cranberrry Jam. This post from Food In Jars also links to pickled cranberries and some other cranberry-related excitement.
Image courtesy of asweetpeachef.com.
  • Green bean casserole. We all love it. However, with a bit of effort, homemade is so much better! Imagine fresh green beans instead of canned, your own white sauce with sauteed mushrooms, and freshly made crispy onion rings. Check out Alton Brown's recipe for Best Ever Green Bean Casserole. It's also quite good with just about a third of a red bell pepper slivered into the beans as well. If you really want to impress your mother-in-law (or just avoid canned cream of mushroom soup), here you go. 
  • Great desserts. For something special, and pretty easy, try one of my favorite recipes. My parents refer to it as "compote" and you can make it in any variation. The three parts are fruit, wine, and spice. Begin with 1 1/2 cup water, 1 1/2 cup wine, and 1/3 cup sugar. Put over a medium heat and let this simmer until it reduces down a bit, about 12 minutes. Taste it to check the sweetness. Add more sugar if needed. Add fruit (about 2 cups, washed and cut into uniform pieces) and spices. Adjust your heat to a low simmer until fruit is soft. Fish out any hard spices like whole cloves or cinnamon sticks, and puree in a blender or with an immersion blender. Strain through a fine sieve and return to pot. Add the extract of your choice. In a small bowl, mix 1 1/2 T corn starch with 1 1/2 T cold water. Mix completely, add to pot, bring to a boil for about 30 seconds, stirring all the time. Here are some combinations I love: 1) a spicy red wine sauce I used in the pavlova recipe. Add raspberries, blackberries, and/or strawberries to this one. Sub in dark brown sugar for a very rich taste. 2) Use white wine and frozen peaches or apricots or fresh mango. For spices, use a pinch of saffron and 1/2 t. orange extract. 3)White zinfandel or rose wine with raspberries, almond extract, and brown sugar. 

You'll wind up with a lovely sauce that is great over cheesecake, panna cotta (I've used this recipe from Ina Garten many times with great results--just omit the balsamic strawberry part and sub in the sauce you just made), or ice cream. Or, you could take those black bananas your kids didn't eat this week, make some Banana Yogurt Bread, toast the slices in a skillet with a bit of butter and serve it with this sauce and some whipped cream.

The recipe for "compote" is after the break...

Friday, November 22, 2013

Talkin' Turkey

Is it just me, or is making the turkey sort of a dreaded task? Either you know you're just setting out to force twenty pounds of dry and/or greasy bird on friends and family, or, if you're like me, you pretty much know you got assigned to turkey duty because no one else wants to take the blame if it sucks.
 Well, suck this, turkey haters. Orange-Rosemary Turkey will never fail you. My dad found this recipe in Bon Appetit in the '90s, and we've used it every year since in some variation. No lie. When I get to the homestead next week, I will take a picture of the well-worn, dog-eared, spattered copy that is kept with the cookbooks. Here's a link to the original recipe. This post will be without a whole lot of pics, which I will take next week to update, but I really felt like it was more important to help save your bird this year, if you belong to a family whose bird is in need of saving. You know who you are. (Allow me to wax poetic here for a moment. Even if you just run down to Wal Mart and grab whatever frozen bird they have there, it's still an animal. One that probably led a pretty s@#tty life until it was sacrificed for your table. I strongly believe that if an animal gives up its life so we can eat it, we owe that animal the best preparation we can muster.)
Hence this simple but delightful turkey makeover. I like to vary this up a little bit, however. Personally, I think you need to make about double the Rosemary-Orange butter. I tend to stuff more  butter in the turkey than this recipe calls for, plus you want some left over for dressing, gravy, and dinner rolls. Because once you taste it, you'll want to smear it on anything that will stand still. Thank goodness, your turkey is probably standing still.
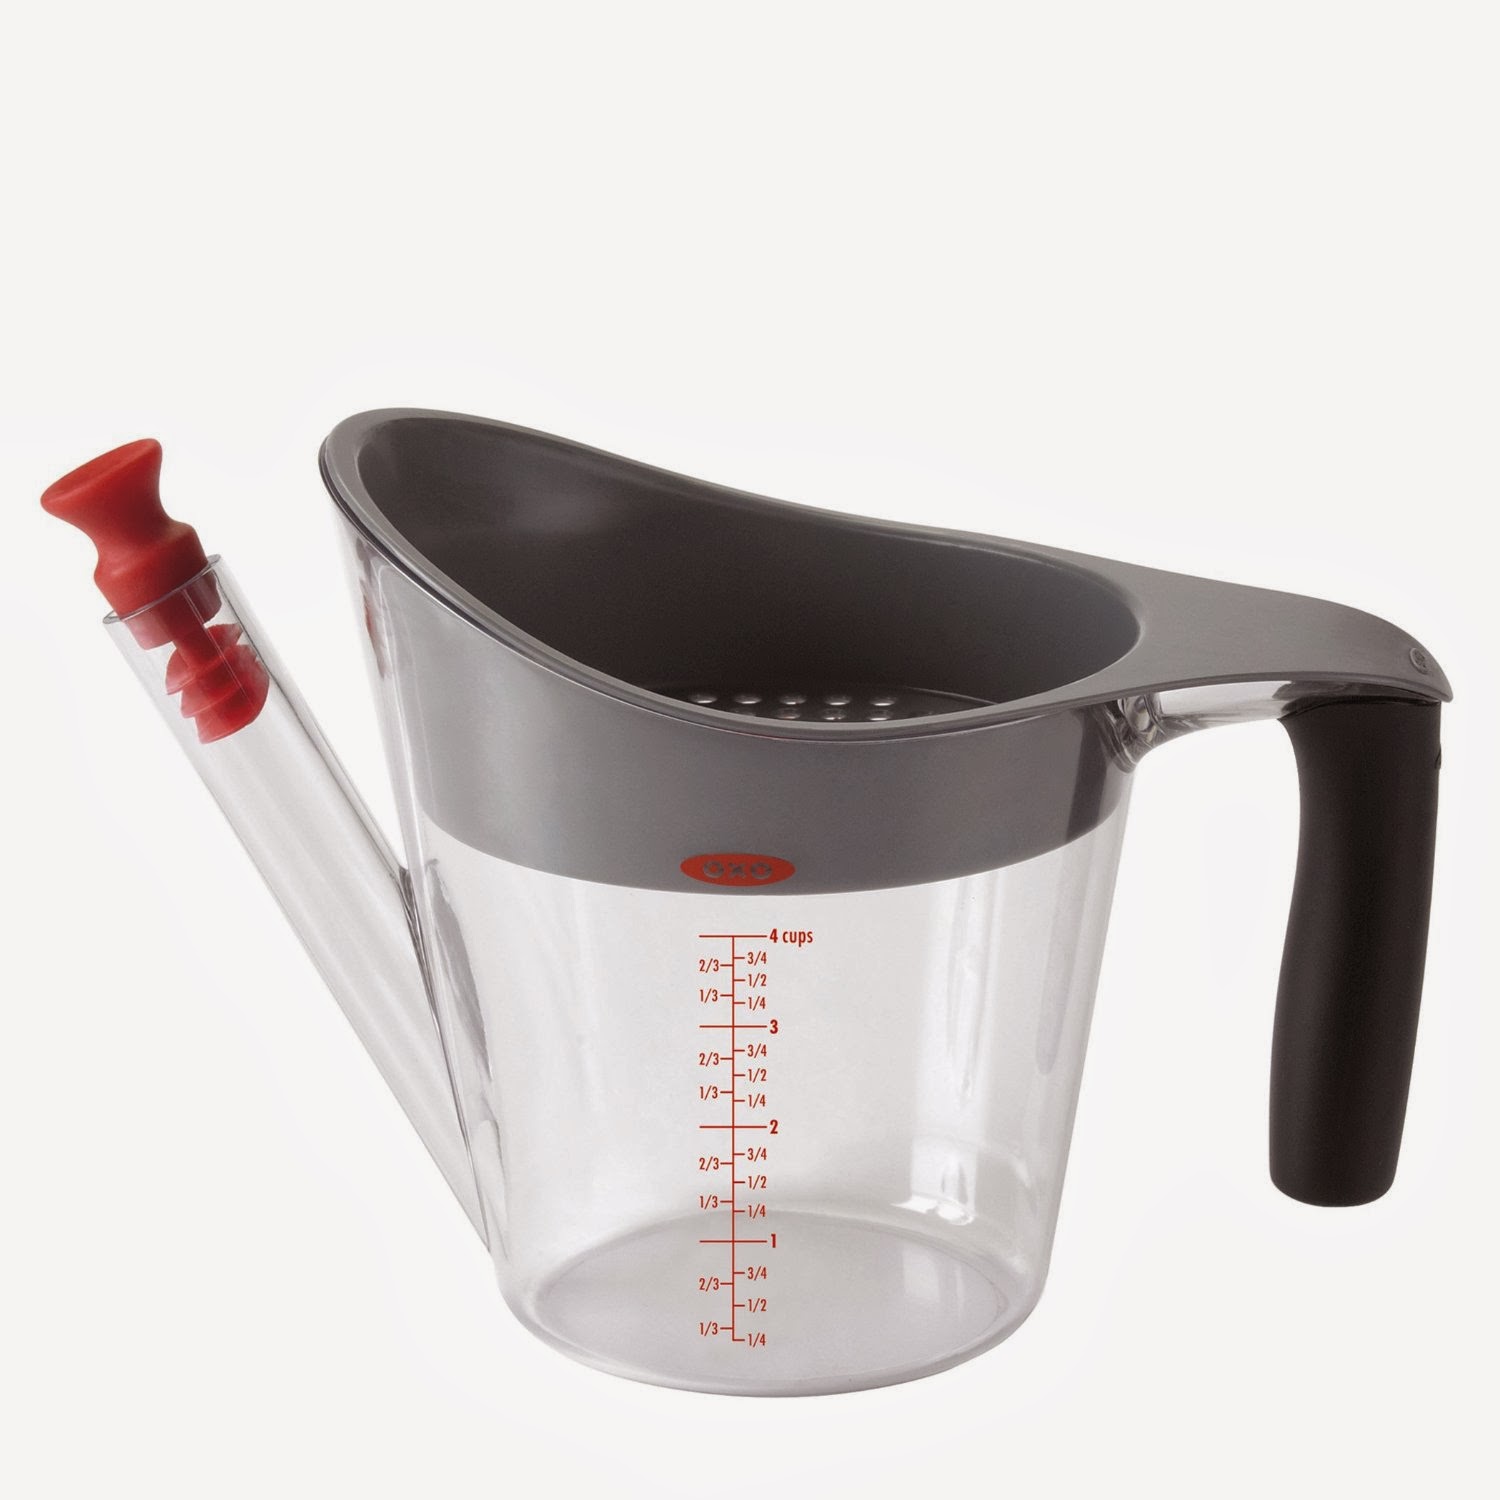
This little tool is the easiest way to get pretty consistent orange or lemon zest. You can then chop with a knife if you want it in smaller pieces.
 So double the butter recipe described in the original. I usually add a bit of black pepper to my butter. This year I also added some frozen grated ginger as well. Mix this up the night before, divide in half (so you have a designated turkey bowl and and everything else bowl. No salmonella for us this year, thank you very much), and refrigerate. You can even make this two days in advance.
 On the day you're cooking your turkey, **GET THE BUTTER OUT OF THE FRIDGE EARLY.** It's a lot easier to stuff the bird with room-temperature butter. And don't lose your mind and microwave the butter to soften it, because it also sucks to try to stuff your bird with completely melted butter.
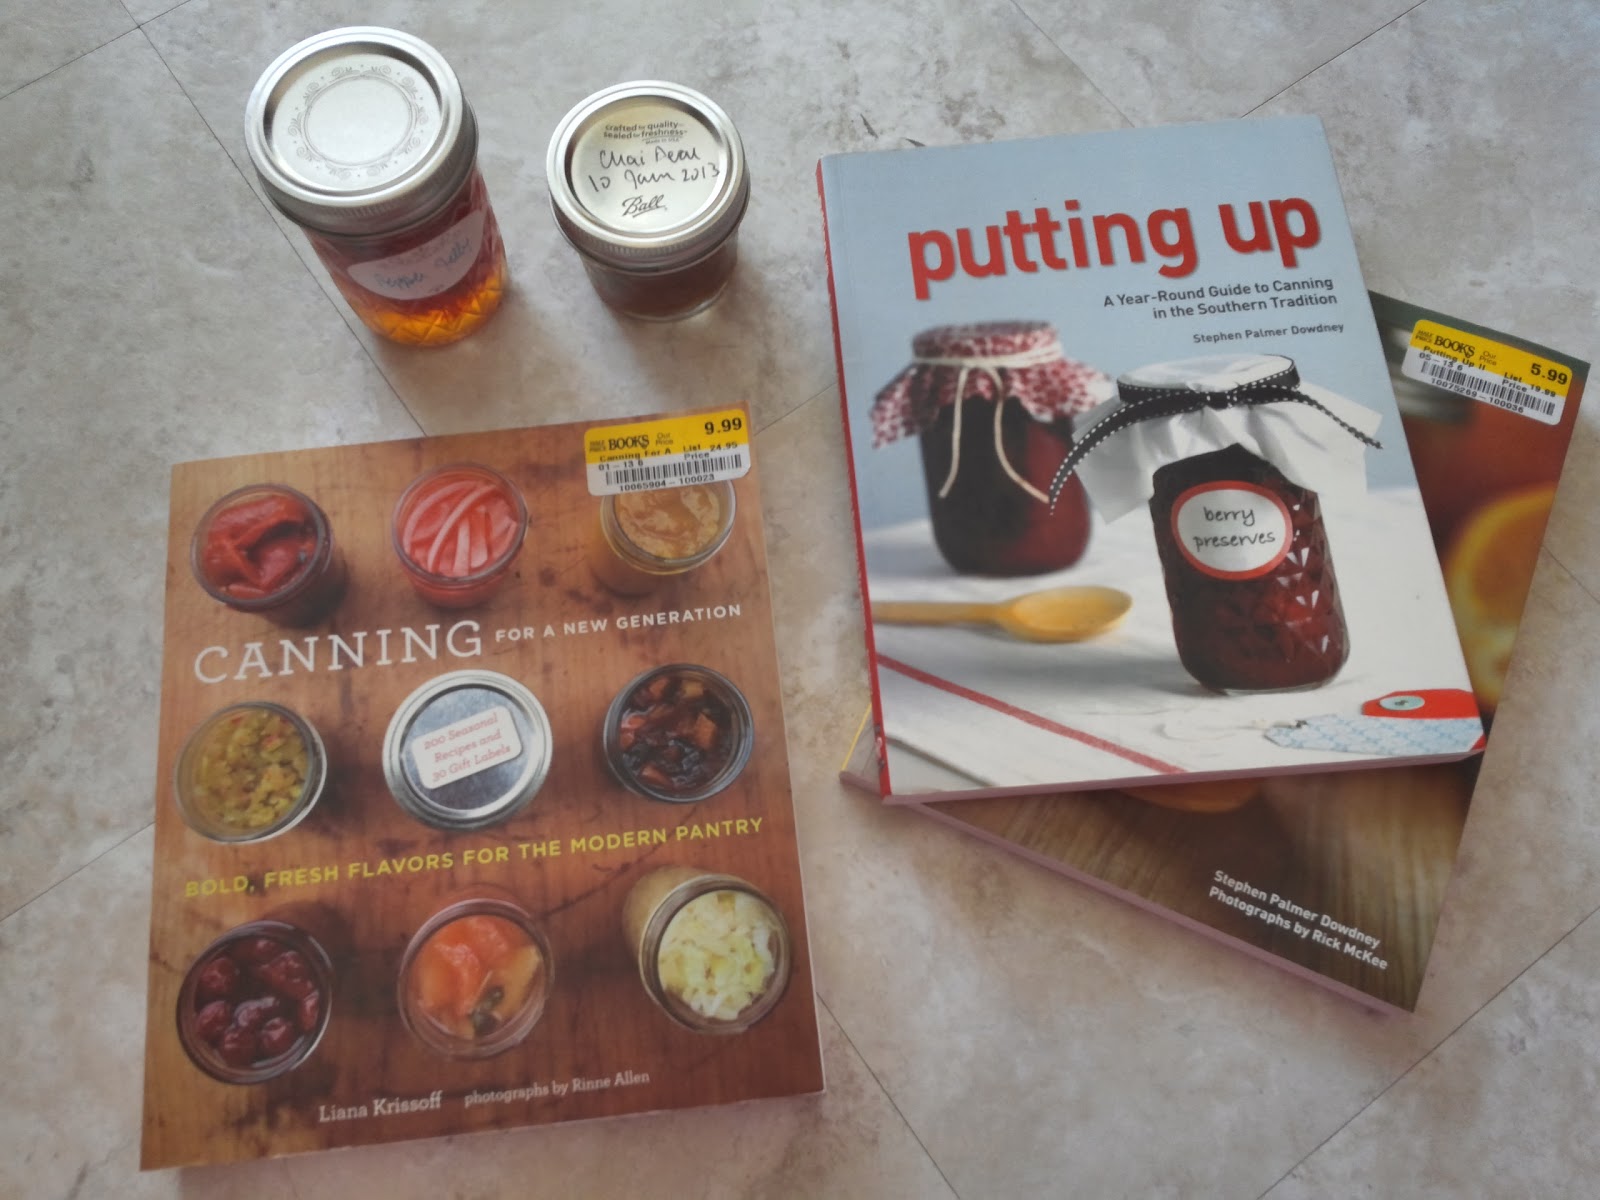
My parents have seriously held onto this magazine since 1989.
A note on turkeys. There's no sacred Thanksgiving writ that says you have to cook a whole bird if you have a small number of people, no one eats dark meat, or you're having multiple proteins. You can easily just buy and prepare the breast if you like. I usually do this at least once between Thanksgiving and Christmas when, inevitably, my husband casts sad eyes at me and says, "I really didn't get much turkey this year. I don't feel fully satisfied in the turkey department." This is not a dirty metaphor; he just wants me to cook another turkey. So I make him a breast, and everyone is happy.

So here we go. You've made your double batch of butter a day or two in advance to let the flavors meld together. You've taken it out of the fridge to warm to room temp. Now, to prep that turkey. I hope, if you bought a frozen turkey, that it's been thawing in the fridge for a couple of days. If not, you may want to put it in a sink of cold (NOT HOT) water to defrost.

When it's defrosted, remove the neck and giblets. You can use these in gravy, if that's how your family rolls, or you can make an excellent stock from them. However, if your turkey comes with a package of pre-made gravy frozen up in there, do your family a great service AND THROW THAT PAP AWAY IMMEDIATELY. Don't even handle it too much, lest you get bad cooking juju on you. Rinse your turkey well. Leave in that little thermometer button that pops out when it's cooking. You don't want to use this to measure when the turkey is done, but you don't want to leave a gaping hole for the juices to run out of either. Make sure you pull out any stray feather ends that may have been left behind.
I stuffed that giant turkey until, as Stanley Tucci said in Julie and Julia, "she just couldn't take it anymore."
Now for the fun part. I'd roll my sleeves up and remove jewelry if I were you. First, you need to gently separate the skin from the muscle of the turkey without shredding it. Slowly and gently, work your fingers in between the skin and muscle, loosening the skin without tearing it. Loosen the skin all over. When you're done, stuff 3/4 of the bowl of turkey butter (so 3/4 of 1/2 of what you made) under the skin, smooshing it around until it's fairly evenly distributed. Then spread the remainder on top of the bird all over the skin to make it crunchy. Stuff the cavity full of onion, garlic (you can just take a whole head, cut it in half through all the cloves to expose them), celery (use the leaves! They're more flavorful than the stalk!), carrots, orange wedges. and rosemary. Make sure your turkey is elevated on a rack.

A note on dressing versus stuffing. "Dressing" is served on the side; "stuffing" is actually stuffed in the turkey to cook. I'm in the anti-stuffing camp. You really have to be careful to make sure the stuffing is heated to a high enough temp so as to not poison everyone with raw-bird juices, and usually, by the time the stuffing is cooked, the bird is overcooked (your stuffing must reach 160 degrees F). I'm not a fan, though I know some people who swear by stuffing and do it well.

Do tuck in the wings so your bird cooks evenly and no floppy bits incinerate in the oven, but don't worry about trussing. It takes longer to cook a trussed bird, and then the breast is dry. 

A note on cooking turkey. This is not an all-day event unless you've stuffed it. It's usually a 2-3 hour event AT MOST, depending on how large your bird is. A breast will take less than half that time.
We had a little disaster with the convection oven being too hot, but we figured it out in time to save the bird. Next time, I think I'll take my blow torch to get a nice, even golden color. 
Your breast meat needs to reach 150 degrees, and the leg meat (it has more connective tissue) needs to hit 160 degrees to be safely done without being overdone. Use a thermometer rather than relying on a set amount of time. Let the turkey warm to room temp before cooking. It will cook more evenly that way. You want to start at a high heat to kill all the surface bacteria and brown the skin, loosely tent some foil over the breast so it doesn't brown further, and then lower the heat for the rest of the cooking time. When I lower the heat, I add a couple of cups each of water and white wine for moisture and to keep my drippings from burning. We usually start ours at 375 degrees until the breast is browned and then reduce the temp to a little less than 325 degrees for the rest of the cooking. But you know what? Screwing up the turkey isn't the end of the world. I accidentally cooked the turkey breast down the entire time one year, and it was awesomely tender. It didn't look pretty, but it was juicy. Undercooked turkey? Slice it and put it in a pan in its own juices to finish cooking it. Overcooked turkey? Slice it and put it in a pan in its own juices over super low heat. Pour your guests another round, and let them eat cake. Or pie.

Another note on cooking turkey. Put the baster down. All it does is make that lovely, crunchy skin soggy. If you don't overcook the turkey and you let it rest for at least ten minutes, it will be juicy.

I don't usually brine my turkeys because I really like to use the drippings, and the drippings from a brined turkey are too salty. To make gravy: in a pot, add 3T Rosemary Orange butter and/or drippings. Let it melt. Whisk in 3T (maybe a bit more) flour to make a roux. Let it cook a minute to get the flour taste out. Slowly,whisk in about 2 cups stock. As you start whisking, it will look like crap, but eventually, it will even out (sprinkle flour, don't dump in one place, and don't use cold flour to prevent clumping).

 Another fun thing you can do is make pretty butter for the rolls.
Use a pastry bag to pipe pretty butter shapes onto parchment paper. 
Pipe some of your fancy Rosemary-Orange butter onto parchment paper and put it in the freezer to set. Arrange it on a plate and set out on the table for buttering rolls.


Wednesday, November 20, 2013

More Holiday Happiness!--Links and Recipes, Oh My!

I cannot believe Thanksgiving is next week. I'm so not ready yet, having just finished all my business for graduation last week and trying to shovel my way out of the pile of grading that accumulated over the last week and half. However, as deep as my denial may be, in one week, the holiday is upon us. So I thought now might be a good time for some links to great recipes, ideas for host/hostess gifts, and some little noshes to have around.

Just say no.
  • So, so over the jellied cranberry sauce that is too sweet and tastes like a cranberry that hid under a dirty bridge for the last two seasons? (And I must apologize to my sister, who quite likes canned cranberry sauce.) Try some Hibiscus Cranberry Sauce. While you're at it, this Cranberry Liqueur looks pretty good too. So you can be festive in your holiday booze-fest. 
  • This is a rad idea and sure to bring a smile to the face of the folks cooking for you this year, if you're not doing it yourself. Vanilla is at the heart of many traditional desserts, so make some homemade vanilla extract and vanilla salt. When you make it, bring some by my place, please.
  • While we're on topic of salt, here's an easy recipe for herbed salt. It's good on everything, easy to make, and you can put it in pretty containers to gift.
  • Did you have an "oh s@#*" moment when your mom asked you do the stuffing? No problem. Check out this Apple-Herb Stuffing
  •  I love this recipe from Tigress in a Jam for Pumpkin Marmalade. I think this would be amazing over a piece of cheesecake.
  • If your family is like mine, we stand around grazing for ages while the cooking goes on. Here's a recipe for Rosemary and Salt Smoked Almonds that might just make you the darling of the day. Or at least make people less resentful when you polish off the last of the bottle of chardonnay.
My grandfather, husband, and two of the family dogs, tearing it up last year.

Monday, November 18, 2013

OhFeelYa's Easy...Dinners--Shephard's Pie

Away we go on another...wait for it...meat and potatoes meal for Ofy's Easy weeknight meals! I swear that when the seasons change, so will the menu items, but right now, my hubby loves these satisfying, traditional, starch-and-protein themed dinners. Up for this week is Shepard's Pie. Quite often, Shepard's Pie is just gross. Maybe it's the peas. But I love it because it's hearty and versatile. I'm using beef stew meat and pork cube steak (which, as far as I can tell, is just ground pork flattened out into a squarish-shape, but whatever) in this version, though lamb is traditionally used. If you think of it, throw your protein into a bowl with garlic, herbs (rosemary, thyme, a bay leaf--they can be dried or fresh), salt, pepper, and wine to marinate in the morning or the night before. This can also be a chicken or vegetarian dish if you like.
Before you get started on the filling, peel (or don't, as you wish) four large baking potatoes and put them in boiling water. For my Shepard's Pie, I used leek, rutabaga, carrot, and kale. You can use anything you like. Even the dreaded peas. For the kale, I shredded it off of the stems and discarded them. Then I heated just a bit of milk with a pinch each of salt and nutmeg to blanch the kale in so it wouldn't be bitter.


In a large cast-iron skillet (or other large oven-proof vessel also safe for the stovetop), heat 2 T of oil to pretty hot. Sear off the protein. Let it get good color on it. Remove the protein to a plate and lower heat. Use a 1/2 cup of beef broth to deglaze your pan. Pour in another 1 1/2 of beef broth. Add a splash of red wine, coffee, 1 t. Kitchen Bouquet, 2 t. Worcestershire sauce, salt, and pepper to the broth. Taste. Adjust as necessary. Combine 1 1/2 T corn starch with that much cool water, stir, and add to broth to make gravy. Let the broth boil for at least a minute and reduce to a simmer. Add in protein and veggies. Let it simmer until the rutabaga and carrots just begin to soften, about 15-20 minutes. Remove from heat.
When you can easily pierce the potatoes with a fork, take them off the heat, drain them, and return them to a low heat, shaking the pot, until they're dry (watery mashed potatoes don't even bear mentioning). Mash the potatoes with whatever you like. At my house, I use about 3T butter, 1/2 cup milk, a splash of cream, salt and pepper and I add milk at intervals until they reach the consistency I want. I like them really smooth, so I use a hand mixer. However, you can do anything you want. Leave the skins on. Leave them chunky. Add sour cream or yogurt in place of the cream. Add cheddar cheese and chives. Remember, the point of the Easy Dinners series is to give you tasty recipes you can make your own.

When your potatoes are mashed, spread them over the pan of meat and veggies, making a crust of sorts. I'm cooking at the lake this weekend, so I'm without all my stuff, but normally I would use my frosting bag to pipe a decorative pattern with the potatoes. As it is, I tried piping them out through a plastic baggie with the corner cut off. The result was rather akin to cow patty pie rather than shepard's pie. It was really unappetizing, and I apologize for not snapping a picture so you could giggle at my lame artistic attempt. I wound up just slapping it around with a spatula to eradicate the patties.
Put your potato-covered masterpiece in the oven at 350 degrees for about 45 minute or until it reaches your desired level of browned and crispy.
When you take it out of the oven, let it sit for 15 minutes-ish so the gravy can thicken and not just run everywhere when you cut into it.
Let's face it; it's exceedingly hard to make Shepard's Pie look pretty. But made right, it's tasty and filling and will last you for an entire work week for about $12-15. Plus you can play with the weird veggies like parsnip and rutabaga. Everybody wins.

I'm super excited to say that I finally got in at the right time to get a basket of food from Bountiful Baskets, a mostly local food co-op this Saturday, so I will report back this weekend. I can't wait!

Shepard's Pie Recipe after the jump!

Sunday, November 17, 2013

Fairy Food for the Holidays: Pavlova

I know this will come as a shock, but I'm sort of addicted to food-related television. I grade papers with Julia Child's shows on in the background (I have them on DVD). I wait in eager anticipation every week for Top Chef like other folks look forward to The Walking Dead. Anyhoo, I was watching reruns of Masterchef: Australia on Youtube the other day, and they made pavlova. Named for the famous Russian ballerina, Anna Pavlova, this really does look like fairy food. Having never heard of pavlova before, I immediately started reading about it. Evidently, it's considered a summery dessert (though Aussies eat it year round), though it feels holiday-esque to me.
It's simple to construct, as long as you're careful. I used Alton Brown's recipe
His instructions were clear and simple (though 4 ounces of egg white is approximately the white of 4 large eggs, and 6 ounces of sugar is just in between 3/4 and 1 cup). If you forget to get your eggs out in advance, put them in a bowl of tepid water to bring them to room temp.
.
Follow his instructions to get the glossy, white mix that you can then shape into a cake-ish circle. I just threw some parchment paper over the bottom of  a springform pan. It worked great.
Admittedly, I did s#$% the bed on this one a little bit in my impatience. When Brown says to let it cool in the oven by letting the door hang open, do it. I, however, really wanted to see it!
So I did. I put it on a cold granite counter. It's supposed to have a few cracks in it like this, but the too-rapid cooling made mine crater a little bit. Clearly, I have the impulse control of a toddler. I do think that next time I will make little single-serving circles because cutting into the big one caused it to break up a bit, which is evidently normal. However, it is sweet and airy and lovely. 

I made a red wine-saffron sauce to go with mine. I really like booze in my food. And while I'm cooking it. And while I'm eating it. This boozy concoction makes a deep reddish-purple, rich, spicy sauce. In a saucepan, combine 1 3/4 cups water, 1 1/2 cups red wine, 2 T balsamic vinegar, 3 T honey, and 1/3 cup sugar. Let that simmer for about 15 minutes or so until it slightly reduces. Taste it and make sure you like the level of sweetness. Remember though, that the pavlova is an extremely sweet dessert to begin with, so you may not want the other components super-sweet as well. To your reduction, add 2T corn starch (mix in a separate bowl with 2T water and then add), a tiny scrape of nutmeg, 2 cloves, and a pinch of saffron. Let this boil for about a minute and then turn off the heat. Remove cloves.

We're big fans of homemade whipped cream around here. I used an 8 oz. carton of heavy whipping cream, 1T powdered sugar, and 1/2 t. orange extract. Whip with a hand mixer until peaks form. Do not comment on how generally dirty this section sounds.
Pavlova with red-wine reduction, whipped cream, and strawberries! It's crunchy on the outside and soft on the inside. The tart strawberries were a good contrast to the sweetness. As much as I generally hate reality television, I have to say that I quite like watching food programs like Masterchef when it's set in other countries. On the down side, it's a huge contrast to the American version, which is much more focused on the theatrics, but on the upside, it's nice to see people being pleasant to one another, and even better, getting to learn about food I've never experienced, which makes me mad to try it. And even more fun, people who make this dessert routinely seem to be engaged in an unspoken contest to see who can pile the most topping on their fragile pavlova before the whole thing collapses. Check it out:
Kiwi, strawberry, and passion fruit are the most common toppings.
How is this not collapsed?
I'm so tempted to see how much I can load on with the next one.
Recipes after the jump!!

Thursday, November 14, 2013

Handy Food Blogs and Some Holiday Meal Links

Well, kids, the holidays are nigh upon us. 
Personally, I love the holidays. They're a good time of year for a food whore. I mean, foodie. I'm hugely fond of cooking for days for the folks I love. I'm sorry to admit it, but I love seeing Christmas displays in October, listening to Christmas music while I'm planning the Thanksgiving menu, and I would totally put up the Christmas tree the day after Halloween if I could talk my husband into it. It's a sickness. I love the colorful, sparkly happiness of it all.

To that end, I thought I'd just do a list of links to fun recipes, blogs, gadgets, and anything else that may inspire you!
  • As you know, I'm a big fan of Ben Starr. Here's a link to his extensive blog post on how to prepare a brined turkey. He even has a video to show you how! 
  • Deb at Smitten Kitchen did a humorous post on how to do chicken stock in the crockpot! Freaking genius, I say, when we all know that good stock is the basis of rad stuffing and gravy and well played at a time when stove-top space is at a premium. 
  • The ladies at Spoon Fork Bacon have a luscious-looking recipe for sweet potato and rosemary gratin for those of you tired of that crap with the marshmallows on top. (I'm deeply sorry if the marshmallow version is your favorite. Sort of.)
  • This little gadget is the secret to turning the turkey drippings into something non-greasy and delicious. 
    The built-in strainer will strain out the big chunks, and if you wait a bit for the grease to separate and rise to the top, the spout will allow you to pour out the tasty juices sans grease. 
  • Every year, I make Martha Stewart's Steamed Cranberry Pudding for my momma. Don't be turned off by "pudding" in the title; it's just a really moist, thick cake that is as good as licking the batter out of the bowl. For the pudding, you'll need one of these:
    You put your cranberry mix in the bottom, top it with the cake batter, and lower the whole thing into a pot of boiling water (up to just below the lip) for a gorgeous holiday cake.
    The best part is that if you get the mold, there are a variety of recipes appropriate for all times of the year at the Martha Stewart Living website. And it's so pretty!
  • Jerry at Cooking Stoned posted this recipe for Cranberry Christmas Sangria. You can bet your turkey wishbone this will be happening at some point Thanksgiving weekend. 
What are some of your favorite Thanksgiving traditions/dishes? Some of our favorites include orange-rosemary turkey, butternut squash risotto, glazed bacon-wrapped green beans, my grandmother's cranberry salad, and maple-pecan pie. I'll post some of those recipes as the big day draws nearer!

Tuesday, November 12, 2013

OhFeelYa's Easy...Dinners--Smashed Potatoes with Bacon and Pickled Veg


This may be my laziest meal yet. But it's been a busy weekend, and my hubby is pretty easy to please. Like I've said before, he loves pork and potatoes like the proverbial fat kid loves cake (I'm the fat kid in this scenario; he's super thin). So I took eight medium-sized red potatoes and microwaved them at two-minute intervals until they were easy to slide a fork into. Lazy, I tell you. Can't even be bothered to bake the potatoes. Set aside.

I cooked a package of thick-cut bacon in the laziest way possible: under the broiler. See that cookie sheet pictured below? You can lay bacon out on it, put it under a 350 degree broiler, and it will cook evenly in twenty minutes or so without crapping up your stove top and popping you in the eye every time you lean over it (am I the only one that happens to?). When the bacon is done, transfer it to a plate with a paper towel to drain. Since bacon grease is like cash money around here, I got out my nearly empty mason jar, put a strainer over it, and tipped the run-off into my stash. Because God forbid we run out of bacon grease up in here. If you do hang on to the grease, and you ought to, make sure you let it cool to room temp before you put it back in the fridge to prevent bacteria growth. Chop the bacon into whatever size makes you happy.

On the still greasy cookie sheet, space your potatoes evenly apart. Using whatever smashing mechanism you fancy, just press the potatoes until they flatten a bit without totally disintegrating. I put a tiny bit of butter on each potato, layered them with bacon, and cracked a generous amount of black pepper over them. Put them back under the broiler to warm it all and crisp up the edges.
I totally get that this is not a heart-healthy meal. I don't personally eat like this because I battle weight and high blood pressure, but my very tall, very thin spouse eats this kind of thing consistently without any cholesterol or weight problems. We should all be so lucky. However, this recipe would work equally well with a shredded rotisserie chicken, some leftover brisket or roast, or pulled pork.

Now for the part that cuts through all the grease and makes this plate of food shine like one of my students before they get their first paper back. Quick-pickled vegetables are bright, cut through rich, fatty foods, and are super easy to make. In a desperate attempt to get some veg into my husband, I went with carrots, onion, and a little garlic. You can also use cucumber, fennel, radish, etc.... Cut three carrots, half an onion, and two cloves of garlic pretty thin. If you have a mandolin collecting dust somewhere, bust it out.
In a non-reactive saucepan (look at the bottom--if it's stainless steel, you're good to go), mix 1 1/2 cups filtered water, 1 cup mirin rice wine vinegar (you can get this on the Asian isle at the grocery store), and a splash of apple cider vinegar. For seasoning, I threw in three juniper berries, two whole star anise, a tablespoon of mustard seeds, 1/2 teaspoon red paper flakes, about five turns of the sea salt grinder, and a tiny pinch of cayenne pepper. Remember, if you are lucky enough to have a Central Market or Whole Foods nearby, you can buy a pinch of these seasonings for pennies (and without having to buy an entire bottle). Use more red pepper if you want it spicy. Bring your snazzy brine to a boil. 
Layer your soon-to-be pickles into a jar and pour the hot brine over them. Pickles come in glass jars for a reason--they don't react well with plastic or reactive metal.  
Again, let them cool completely before you refrigerate. If you want them super crunchy, let the brine cool before you pour it on the vegetables. I like mine mostly crunchy, and I pour the hot brine over them after it's not boiling any more. (If you do cucumbers, which are more fragile than carrots, then I would let the brine cool a bit to at least warm but not hot before adding for crunchy cucumbers.) If you want the veggies a cooked consistency, put them in the boiling brine and let them cook, but not all the way. It's up to you! Remember they'll continue to soften in the brine after they're refrigerated.The longer these sit, the better they taste, so make them first!
Holy crow, these are good. They take this very basic meal and make it a lot more special. Plus, making your own pickles will impress the crap out of your family! 
Yum. I had one forkful and then turned the plate over to my husband, who promptly doubled the amount of food on the plate. Yesterday, we had a Veteran's Day celebration at school. Our little cantina catered in sandwiches, brownies, etc...and I took the larger jar of pickled carrots to spice up the rather bland sandwiches. They were a big hit with the vets!

Monday, November 11, 2013

Honeysuckle Pomegranate Jelly

Oh, pomegranate, how do I love thee...but I hate your damn seeds! I really fell in love with pomegranate at a work picnic. We were all asked to bring something from our family/ethnicity. One of my colleagues had made wonderful flatbread and served it with barely pulled-apart hunks of pomegranate drizzled with honey. It was gorgeous and exotic but had so many seeds that I found unpleasant to chew. But, I love the flavor of the juice, so when I saw these two pomegranates, literally jumping off the shelf to get into my cart, I thought, it's jelly time! You know I also have massive tea fetish, particularly when it comes to jam and jelly. I also knew I didn't have enough fruit to make much jelly, so I would need some extra liquid.
So, I made a simple syrup infused with the tea first. I put 1 1/2 cups each of sugar and filtered water, along with five Republic of Tea White Honeysuckle tea bags. I really wanted to go with a white tea so as to not overpower the pomegranate or dilute the beautiful ruby color. When the syrup had gotten, well, syrup-y, and the tea flavor was strong enough, I strained it all into a bowl. Then I dumped the pomegranate and 3T of water into the pot to simmer and break down. I did use the side of my spoon to help burst some of the seeds, but don't go too nuts. If you pulverize the seeds, your juice may be bitter. Once the fruit was broken down, I gently ran it through a chinois (any fine strainer or cheesecloth will do).
When I had gotten all the juice extracted that I could, I put the syrup, juice, lemon juice, vanilla and allspice back in the pot to heat up. When it came to a boil, I added the pectin and let it boil for a minute. I did a crappy job on my frozen saucer test, however, so I'm suggesting you all add more pectin than I did (I adjusted the recipe below for you). I'm always shy with the pectin, and then I have very, um, juicy jelly. Sigh. I will learn one of these days.

While I was working on my jelly, I found a standard recipe for pumpkin bread and made it with some of last week's fresh pumpkin puree and added in some extra spices to compensate.
I was kicking myself for not having nuts. Sigh. However, I'm a big fan of brushing the crust with melted butter both once while it's baking and then again when you take it out of the oven so some pretty turbinado sugar sprinkled on will stick. Especially when you have a nutty crust (nuttier than me), this makes for a nice, caramelized crunch on top.

Voila! Honeysuckle Pomegranate Jelly and Pumpkin bread. You better believe I took one of these muffins and scoured the jelly stuck to the bottom of the pot. The pumpkin and pomegranate were particularly fabulous together.

Saturday, November 9, 2013

Cookbooks I Can't Live Without

How many cookbooks do you have? I only ask because I have a sneaking suspicion that I may be a cookbook hoarder. I see my friends and family cocking eyebrows. Fine, I'm a book hoarder in general. What do you expect from a literature professor, really?
One wall of my study, complete with Colin Firth.
The other wall. That's my Granny Pauline's purple loveseat. She taught me how to make apple pie, pancakes, cheese grits, and fried chicken.
Anyway, as bookish folk here in my household, (thank goodness my husband is a lit professor as well because he never criticizes my great love of books), our motto is "When in doubt, go look and see if we have a book on that topic." A great majority of the time, we do.

Cookbooks are no exception. I love them feverishly. And now that I'm not always scrounging for material for my dissertation, the cookbook section is the first I gravitate towards when I go to any bookstore. I thought I might go through my collection and write a bit on a handful of the cookbooks I love the most and why. This is my current cookbook collection, conveniently stashed in the kitchen, finally.
I finally broke down and added a cookbook shelf in my kitchen. Before, I had cookbooks stashed in about four different locations. This is a super-cheap Ikea garage shelf I painted with leftover paint I had from the wall behind it.
 A new cookbook I recently picked up, Harold McGee's Keys to Good Cooking, is the most amazing encyclopedia of cooking I've seen so far. As a former literature professor, McGee is a man after my own heart. Read more about McGee, an avid food writer, here. He's remarkable. This book, however, is not a collection of recipes. McGee doesn't tell you what to cook but rather how to cook it. He cover things that vex every cook, like how to keep sauces from getting overly thick or what to do if they break. From canning to baking to roasting to frying, McGee will tell you the inside secrets to making it work.


As you can see from the things I choose to cook, my current fascination is with canning. My grandmothers and mother canned, and I'm teaching my daughter how to do it. Not only is it incredibly satisfying to make delicious things to serve, it's even more satisfying to know exactly what went into it. I can use fruit and vegetables from a farmer's co-op or just use organic fruit. I can regulate the amount of sweeteners. It's also handy to have a pantry full of this stuff when you need a quick gift for someone. The first canning book I ever read was Rick McKee's Putting Up. I quickly found a copy of the companion book, Putting Up More. McKee, who has canned professionally for many years, provides the best explanations of the canning process (and all its different methods) I've ever seen. While I don't love some of his practices (inversion canning is not recommended by the USDA), and I'm not a fan of the Sure-Gel thickening aid he suggests canners use, I owe him a huge debt of gratitude for my canning knowledge. His recipes are also very safe because he carefully tests and explains the acidity of each recipe.


 While I very much enjoy McKee's knowledge base and his salsa recipes, Liana Krissoff's Canning for a New Generation rocked my world, recipe-wise. Her recipes are unlike any I've ever seen, and they speak to my little foodie soul. I CAN'T WAIT to try her Strawberry and Lavender Jam and her Mango Jam with Lime. She has a fantastic collection of eclectic recipes for mad canners that include mini tamales (!), kimchi, and pickles.

My grandfather has long since advocated eating weird things for health. As a kid, I never really paid attention to his obsession with echinacea and herbs. However, the man is into his '90s, in amazing health, and still living on and running his farm, so it's either his eating habits or his sheer ability to fly under the Almighty's radar keeping him so prime. Anyway, I'm sort of taken with the idea of making my own sauerkraut (which has been widely advocated by many holistic practitioners as being rife with health benefits). I made a badly researched try a few months ago and came away with an important lesson: don't start a batch of homemade sauerkraut and go to Costa Rica for drunken derby vacation, thus leaving said sauerkraut to its own devices. I wouldn't wish the result on anyone. After I recovered from the mess I came home to, I started reading up on how to undertake the process correctly. A couple of weeks ago, I found this little gem at a used bookstore. Klaus Kaufman's 2002 Making Sauerkraut and Pickled Vegetables at Home: Creative Recipes for Lacto-Fermentated Food to Improve Your Health goes through the history of fermented foods (did you know that sauerkraut is not originally German? They stole it from Genghis Khan, who evidently traveled with crocks of fermented foods, including cabbage), the science of the process and its health benefits, and contains many detailed instructions on how to pickle just about anything. He also includes some great ideas of dishes to use pickled food in, and, damn, they look good. 

I've also photographed some herbs and spices used for pickling here. Taken from Central Market's bulk bins, I got Juniper berries for $.45, caraway seed for $.22, and whole brown mustard seeds for $.14. Experimentation doesn't have to cost the earth!

Let me just begin by saying that Nigel Slater is a culinary stud and writes about food in a way that is so sexy, you'll need to step outside for a cigarette after. This British writer, whom I discovered after a dear friend sent me several of his books as a wedding gift, has a variety of good cookbooks out, including Real Fast Food. However, The Kitchen Diaries: A Year in the Kitchen with Nigel Slater, is like the smart prose of Jane Austen (the man is British) meets your favorite novel with a dash of food porn added for good measure. I read this cover to cover in a few days. Slater goes through his year, documenting what he made and ate, depending on what was locally available, throughout the year. He's a real person too, so some days he cooks fancy for friends and families, and some days he throws together a quick five or twenty-five minute weekday dinner that will make you SWOON. The variety of the dishes he makes, his personality as a writer, and the photography here will make you appreciate food if nothing else has.

And, of course, I'll end with a cookbook devoted to the cuisine of the Divine Miss Jane. My love of literature really began with Jane Austen, and she was the topic of the first successful dissertation chapter I wrote. My husband got me this particular cookbook, entitled The Jane Austen Cookbook by Maggie Black and Deidre Le Faye a few years ago. Now that I have time, I'd like to investigate what I have always though of as the dubious traditional cuisine of Austen's England. Though I'll probably skip Vegetable Pudding, I am going to experiment with Fricassee of Turnips and something called, I kid you not, A Nice Whet Before Dinner. It gives a great history of the way a table would have been set and the expected courses, etc... during Austen's time. Don't judge me; I'm a nerd.
The Jane Austen Cookbook. Next to it is a clay figurine of Pride and Prejudice, made by my sister, that stood atop my wedding cake with a figure of As I Lay Dying by William Faulker for my husband.
 To end, I was reading a bit online about the history of cookbooks, and I found a lovely, remarkable website developed at Michigan State University, called Feeding America. It's an amazing archive of thousands of cookbooks written across centuries. I foresee some afternoons spent combing this collection!