Monday, November 11, 2013

Honeysuckle Pomegranate Jelly

Oh, pomegranate, how do I love thee...but I hate your damn seeds! I really fell in love with pomegranate at a work picnic. We were all asked to bring something from our family/ethnicity. One of my colleagues had made wonderful flatbread and served it with barely pulled-apart hunks of pomegranate drizzled with honey. It was gorgeous and exotic but had so many seeds that I found unpleasant to chew. But, I love the flavor of the juice, so when I saw these two pomegranates, literally jumping off the shelf to get into my cart, I thought, it's jelly time! You know I also have massive tea fetish, particularly when it comes to jam and jelly. I also knew I didn't have enough fruit to make much jelly, so I would need some extra liquid.
So, I made a simple syrup infused with the tea first. I put 1 1/2 cups each of sugar and filtered water, along with five Republic of Tea White Honeysuckle tea bags. I really wanted to go with a white tea so as to not overpower the pomegranate or dilute the beautiful ruby color. When the syrup had gotten, well, syrup-y, and the tea flavor was strong enough, I strained it all into a bowl. Then I dumped the pomegranate and 3T of water into the pot to simmer and break down. I did use the side of my spoon to help burst some of the seeds, but don't go too nuts. If you pulverize the seeds, your juice may be bitter. Once the fruit was broken down, I gently ran it through a chinois (any fine strainer or cheesecloth will do).
When I had gotten all the juice extracted that I could, I put the syrup, juice, lemon juice, vanilla and allspice back in the pot to heat up. When it came to a boil, I added the pectin and let it boil for a minute. I did a crappy job on my frozen saucer test, however, so I'm suggesting you all add more pectin than I did (I adjusted the recipe below for you). I'm always shy with the pectin, and then I have very, um, juicy jelly. Sigh. I will learn one of these days.

While I was working on my jelly, I found a standard recipe for pumpkin bread and made it with some of last week's fresh pumpkin puree and added in some extra spices to compensate.
I was kicking myself for not having nuts. Sigh. However, I'm a big fan of brushing the crust with melted butter both once while it's baking and then again when you take it out of the oven so some pretty turbinado sugar sprinkled on will stick. Especially when you have a nutty crust (nuttier than me), this makes for a nice, caramelized crunch on top.

Voila! Honeysuckle Pomegranate Jelly and Pumpkin bread. You better believe I took one of these muffins and scoured the jelly stuck to the bottom of the pot. The pumpkin and pomegranate were particularly fabulous together.

Saturday, November 9, 2013

Cookbooks I Can't Live Without

How many cookbooks do you have? I only ask because I have a sneaking suspicion that I may be a cookbook hoarder. I see my friends and family cocking eyebrows. Fine, I'm a book hoarder in general. What do you expect from a literature professor, really?
One wall of my study, complete with Colin Firth.
The other wall. That's my Granny Pauline's purple loveseat. She taught me how to make apple pie, pancakes, cheese grits, and fried chicken.
Anyway, as bookish folk here in my household, (thank goodness my husband is a lit professor as well because he never criticizes my great love of books), our motto is "When in doubt, go look and see if we have a book on that topic." A great majority of the time, we do.

Cookbooks are no exception. I love them feverishly. And now that I'm not always scrounging for material for my dissertation, the cookbook section is the first I gravitate towards when I go to any bookstore. I thought I might go through my collection and write a bit on a handful of the cookbooks I love the most and why. This is my current cookbook collection, conveniently stashed in the kitchen, finally.
I finally broke down and added a cookbook shelf in my kitchen. Before, I had cookbooks stashed in about four different locations. This is a super-cheap Ikea garage shelf I painted with leftover paint I had from the wall behind it.
 A new cookbook I recently picked up, Harold McGee's Keys to Good Cooking, is the most amazing encyclopedia of cooking I've seen so far. As a former literature professor, McGee is a man after my own heart. Read more about McGee, an avid food writer, here. He's remarkable. This book, however, is not a collection of recipes. McGee doesn't tell you what to cook but rather how to cook it. He cover things that vex every cook, like how to keep sauces from getting overly thick or what to do if they break. From canning to baking to roasting to frying, McGee will tell you the inside secrets to making it work.


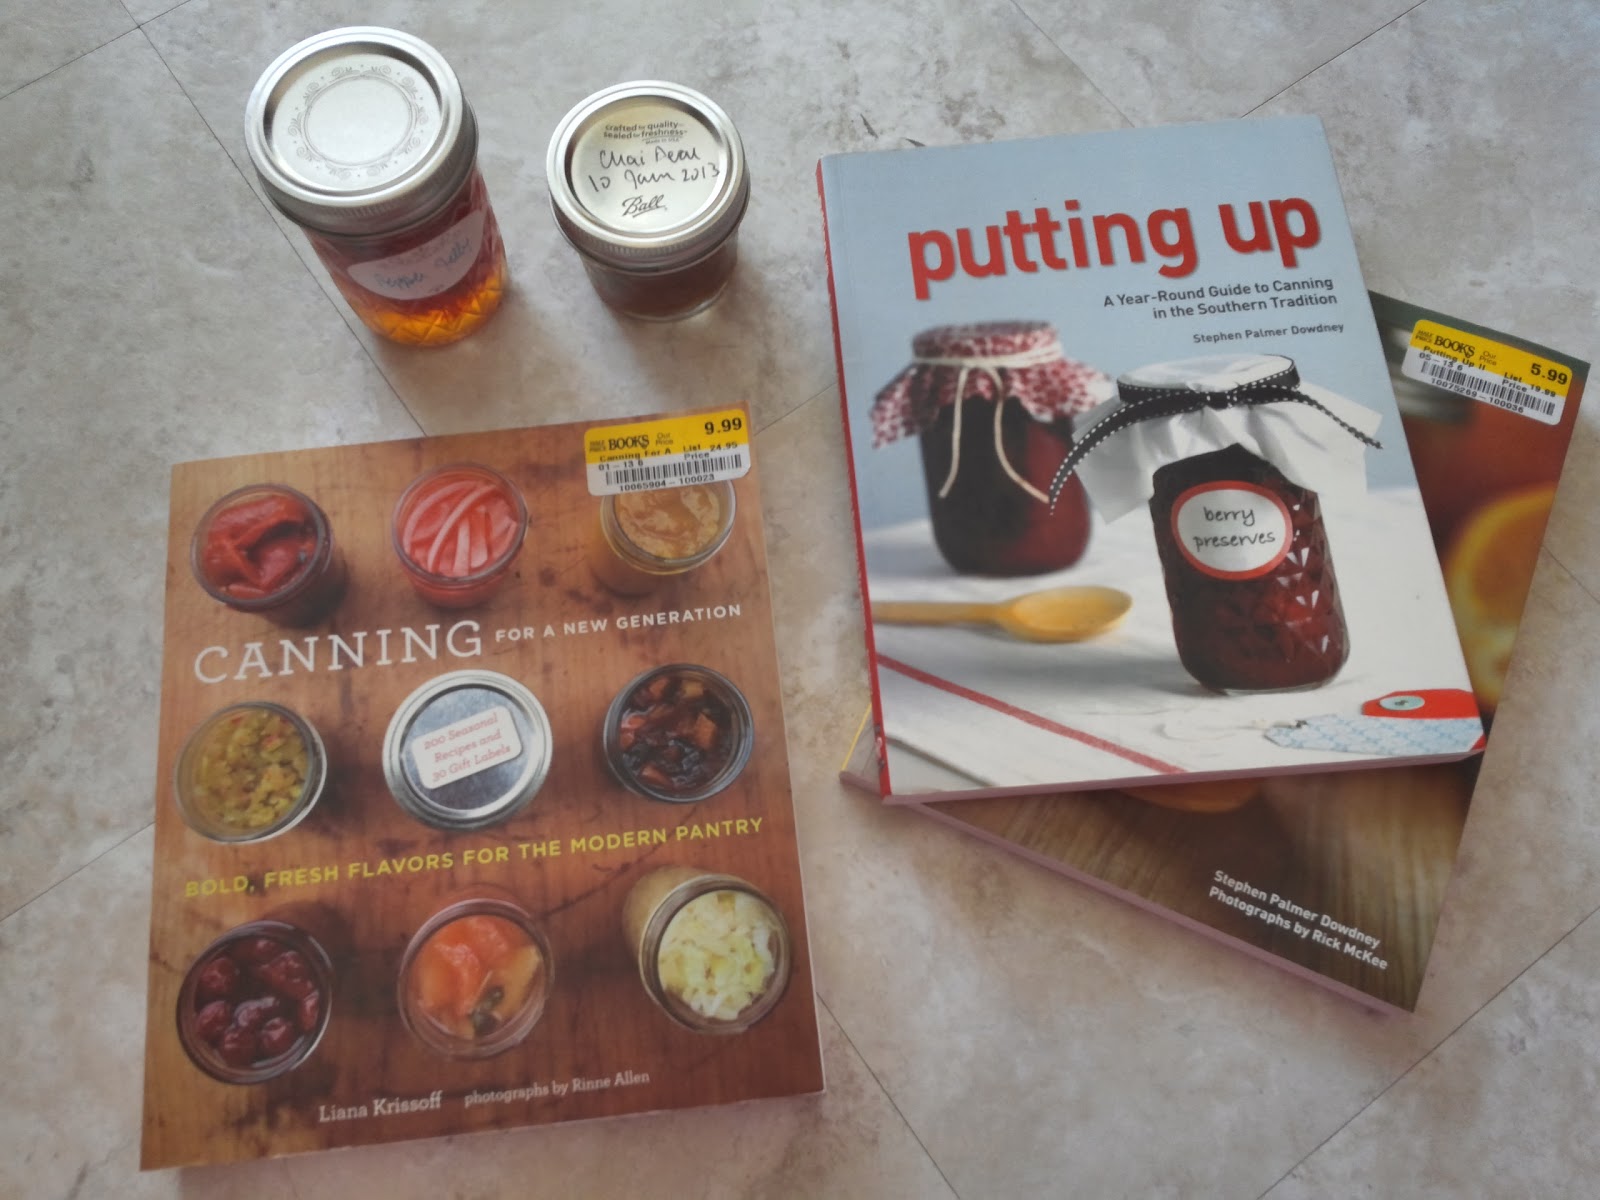
As you can see from the things I choose to cook, my current fascination is with canning. My grandmothers and mother canned, and I'm teaching my daughter how to do it. Not only is it incredibly satisfying to make delicious things to serve, it's even more satisfying to know exactly what went into it. I can use fruit and vegetables from a farmer's co-op or just use organic fruit. I can regulate the amount of sweeteners. It's also handy to have a pantry full of this stuff when you need a quick gift for someone. The first canning book I ever read was Rick McKee's Putting Up. I quickly found a copy of the companion book, Putting Up More. McKee, who has canned professionally for many years, provides the best explanations of the canning process (and all its different methods) I've ever seen. While I don't love some of his practices (inversion canning is not recommended by the USDA), and I'm not a fan of the Sure-Gel thickening aid he suggests canners use, I owe him a huge debt of gratitude for my canning knowledge. His recipes are also very safe because he carefully tests and explains the acidity of each recipe.


 While I very much enjoy McKee's knowledge base and his salsa recipes, Liana Krissoff's Canning for a New Generation rocked my world, recipe-wise. Her recipes are unlike any I've ever seen, and they speak to my little foodie soul. I CAN'T WAIT to try her Strawberry and Lavender Jam and her Mango Jam with Lime. She has a fantastic collection of eclectic recipes for mad canners that include mini tamales (!), kimchi, and pickles.

My grandfather has long since advocated eating weird things for health. As a kid, I never really paid attention to his obsession with echinacea and herbs. However, the man is into his '90s, in amazing health, and still living on and running his farm, so it's either his eating habits or his sheer ability to fly under the Almighty's radar keeping him so prime. Anyway, I'm sort of taken with the idea of making my own sauerkraut (which has been widely advocated by many holistic practitioners as being rife with health benefits). I made a badly researched try a few months ago and came away with an important lesson: don't start a batch of homemade sauerkraut and go to Costa Rica for drunken derby vacation, thus leaving said sauerkraut to its own devices. I wouldn't wish the result on anyone. After I recovered from the mess I came home to, I started reading up on how to undertake the process correctly. A couple of weeks ago, I found this little gem at a used bookstore. Klaus Kaufman's 2002 Making Sauerkraut and Pickled Vegetables at Home: Creative Recipes for Lacto-Fermentated Food to Improve Your Health goes through the history of fermented foods (did you know that sauerkraut is not originally German? They stole it from Genghis Khan, who evidently traveled with crocks of fermented foods, including cabbage), the science of the process and its health benefits, and contains many detailed instructions on how to pickle just about anything. He also includes some great ideas of dishes to use pickled food in, and, damn, they look good. 

I've also photographed some herbs and spices used for pickling here. Taken from Central Market's bulk bins, I got Juniper berries for $.45, caraway seed for $.22, and whole brown mustard seeds for $.14. Experimentation doesn't have to cost the earth!

Let me just begin by saying that Nigel Slater is a culinary stud and writes about food in a way that is so sexy, you'll need to step outside for a cigarette after. This British writer, whom I discovered after a dear friend sent me several of his books as a wedding gift, has a variety of good cookbooks out, including Real Fast Food. However, The Kitchen Diaries: A Year in the Kitchen with Nigel Slater, is like the smart prose of Jane Austen (the man is British) meets your favorite novel with a dash of food porn added for good measure. I read this cover to cover in a few days. Slater goes through his year, documenting what he made and ate, depending on what was locally available, throughout the year. He's a real person too, so some days he cooks fancy for friends and families, and some days he throws together a quick five or twenty-five minute weekday dinner that will make you SWOON. The variety of the dishes he makes, his personality as a writer, and the photography here will make you appreciate food if nothing else has.

And, of course, I'll end with a cookbook devoted to the cuisine of the Divine Miss Jane. My love of literature really began with Jane Austen, and she was the topic of the first successful dissertation chapter I wrote. My husband got me this particular cookbook, entitled The Jane Austen Cookbook by Maggie Black and Deidre Le Faye a few years ago. Now that I have time, I'd like to investigate what I have always though of as the dubious traditional cuisine of Austen's England. Though I'll probably skip Vegetable Pudding, I am going to experiment with Fricassee of Turnips and something called, I kid you not, A Nice Whet Before Dinner. It gives a great history of the way a table would have been set and the expected courses, etc... during Austen's time. Don't judge me; I'm a nerd.
The Jane Austen Cookbook. Next to it is a clay figurine of Pride and Prejudice, made by my sister, that stood atop my wedding cake with a figure of As I Lay Dying by William Faulker for my husband.
 To end, I was reading a bit online about the history of cookbooks, and I found a lovely, remarkable website developed at Michigan State University, called Feeding America. It's an amazing archive of thousands of cookbooks written across centuries. I foresee some afternoons spent combing this collection!

Thursday, November 7, 2013

OhFeelYa's Easy...Dinners--Beef and Root Veggie Stew

It's finally starting to get cold here, and my friend Stephanie asked me to come up with an easy week-night stew. So here we go!

As you know, my hubby is a meat and potatoes fellow. But I can only cook pork so many times in a row before I can't take it anymore. On our first cold weekend in Dallas, I thought a thick beef stew would be finally be appropriate.

You can use any combination of root vegetables here. As pictured, I used three large, red potatoes (I leave the skins on because Jay loves them), some turnips I had languishing in the veggie drawer, and a few carrots my daughter's rabbits will never miss. I also added a roughly chopped onion and three cloves of garlic. Like with the pork and potatoes, I don't worry about a beautiful display of knife skills on the veggies. You do want the pieces to be roughly the same size they cook at the same rate, and larger rather than smaller so they don't go to mush. 

I picked up a package of pre-cut beef (usually helpfully labeled "stew meat") from the grocery store. In a large bowl, I mixed about 3T of flour, salt and pepper to toss the beef in. You can add cayenne if you like it spicy or garlic salt if you enjoy that flavor (my family are all avid garlic salt devotees). Once you mix the dry ingredients, toss the beef in the flour to coat evenly.
Personally, I only like to crap up one pot/pan on my easy weeknight meals. So, I take my handy, medium-sized pot that is both stovetop and oven safe, put in 2-3 T of fat (bacon grease for my husband, but you can use any oil) over a medium heat until it gets hot. Dump in your beef, scoot it around so it's only one layer deep, and let it brown. Flip it and let it brown on the other side. Don't worry if it's sticking to the bottom; remember, that's where the flavor lives. Just don't let it burn.

Once your beef is browned on both sides, remove it to a bowl. Now deglaze the pot you're using (this just means to add liquid and scrape off all the stuck-on crunchy bits). I like to use wine, and I used red wine here. However, if you don't keep wine handy, you can use beef stock at this point. 

If you're not down to make your own stock from scratch, and who on earth is in the middle of the week, I recommend Better Than Bouillon. It's available at most grocery stores and comes in a variety of flavors like beef, chicken, veggie, and veal. It's a really thick paste that you mix with hot water. It's SO MUCH BETTER than that wretched canned beef stock, which tastes like tin and salt. It also keeps really well in the fridge.

Once your veggies are chopped, the beef is browned, and the pot or pan is deglazed, now you can add it all together. Add in a can of tomato sauce, enough beef broth to barely cover the beef and veggies, and salt and pepper to taste. Some thyme or rosemary are nice, maybe a bay leaf if you have one. Here's another trick: keep some instant coffee or a half cup leftover from your morning pot. This will add rich flavor to almost any beef dish with broth. Add in a teaspoon of instant if that's what you have, along with a splash of Worcestershire if you have some.
You're ready to cook! I cooked this at barely a simmer for about two hours. Add a lid about halfway through. (Letting steam escape in the first hour will thicken the stew and intensify the flavor). As soon as your beef and veggies are tender, it's done. Taste your broth periodically and adjust with salt, pepper, garlic powder, Worcestershire, and more instant coffee as needed until it tastes great to you! It may look a bit thin when it's really hot, but it will thicken as it cools.
Small bowl of Beef Stew with half an apple leftover from lunch. YUM!
The best thing about this recipe is that the prep is quick, and then you can just leave it to cook with occasional stirring and tasting. Very hearty, and plenty of leftovers! I got Jay a loaf of sourdough bread to eat with his stew, and it makes me feel so good when my family is eating something hearty and economical that is not overly processed.

And, just to show you all that I do actually eat all that I cook, I took a picture of my lunch I packed for work yesterday.
Curried Pumpkin Soup (from the pumpkin puree), sourdough bread, and some refrigerator pickles I made a few weeks ago. For me, this is a perfect light lunch for work when I don't want to get sleepy. 

The recipe for Beef Stew is after the jump...

Monday, November 4, 2013

Earl Grey Jelly (and Jane Austen's Fight Club)


There's nothing better in the world than a good cup of tea. Well, there might be some things, but they're probably not appropriate for discussion here. But really, tea is so versatile. Dark and rich or light and fruity, exotic or plain ole' breakfast tea, I really feel like there's little in this world that can't be improved by a good cup of tea. I've run across several recipes for jams and jellies that incorporate tea, but at one point (I wish I could remember where), I found a recipe for just tea-infused jelly. Screw the fruit; there's tea! I finally got around to making this jelly, and it's like Fight Club meets Jane Austen, and they made jelly. It's that rad. 

I haven't tried this recipe with any other teas yet, but I think pretty much anything will work. I'm going to do green tea with honey instead of sugar next. So here's what you do: take two cups of filtered water and 9-12 teabags, depending on how strong you want it. Make sure you do something intelligent with the tea bag strings and tags so they don't set on fire dangling down the side of your pot.

Bring the water to a boil, and then let your tea bags steep in the water for thirty minutes. When it's done, discard the tea bags, measure your water, and make sure you still have two cups of liquid. Add more filtered water if needed.


Add in 1/4 cup bottled lemon juice (it's important you use bottled and that you use it all to make this jelly safe for canning) and 3T powdered pectin. Let the mix boil. Now, the recipe I jotted down on a napkin called for 3 cups of sugar. That sounds insane to me, but if you enjoy sugar shock, go for it. I used about     1 3/4 cup of sugar, stirred it in until it melted, and let it get to a hard boil and stay there for a minute (you have to let it get hot enough to reach the temp where pectin gels). Now, it can be a risk, messing with sugar in these recipes because the pectin and sugar react to one another to make the jelly set. So you have to use some. Taste it and see if it's sweet enough for you as you go. Keep a saucer in the freezer. When the mix has boiled for a minute, put a dab on the cold plate. If, after about 10-15 seconds, it gels up, you're good to go.

Make sure you've sterilized your jars in a boiling water bath and softened your lids (remember, you can only use the flat lid part ONCE to process a jar and make it shelf stable. Discard after one use). Pour into your jars, wipe the rims, lid them up, and process in a boiling water bath for five minutes. If you don't want to process in a water bath, just make the jelly and keep it in the fridge.

This recipe made 3 half pints with a tiny bit left over for me to snack on. And snack I did.

I'm not going to lie. This is totally a Popeye's biscuit. After having spent the afternoon drying herbs, pureeing pumpkin, and making jelly, I realized I'd eaten the last of my leftovers for breakfast and was way too tired to cook anything else. So I had a weak moment. Sue me. I'm kidding! I'm just feisty because this jelly is truly as cool as this video of the Jane Austen Fight Club. No lie.

**Remember, it's really important to do some research about canning if you want to produce jars you can keep in the pantry rather than in the fridge. Botulism is some serious nasty. I haven't provided a basic run-down of Canning 101 here because there are links to several good resources for this on my website page. PLEASE don't can ANYTHING until you've educated yourself.**

Saturday, November 2, 2013

The Economical Kitchen-Pumpkin Edition

Happy November from Colonel Brandon!
It's two days after Halloween, and I bet your children's magnum opus pumpkin carvings are sitting on your front porch, about five days out from being a disgusting puddle of mush. Yup, me too. Plus one that didn't get carved. So it's time for another installment of "The Economical Kitchen-Pumpkin Edition." Turning that pumpkin into about 15 cups of lovely pumpkin puree is really easy. However, it is a bit time consuming. One of my favorite bloggers, Ben Starr, who was on Masterchef Season 2, and is such a freaking cutie, has instructions here.

I opted to cook my halved pumpkin in the oven at 350 degrees while I puttered around and finally made Earl Grey jelly (tomorrow! I promise I will post about it tomorrow!). As per Ben's instructions, when it was cooked, I scooped all the yuck out of the middle. I didn't want to put the pumpkin in my food processor because it is an unholy pain in my ass to clean. So I did one half of the pumpkin at a time, scooping it into a pot so I could use my immersion blender to puree. (My actual blender died recently in a tragic Srirancha Hummus debacle about a month ago. The hummus was so good, it was almost worth it, and now I can cast sad eyes at every Vitamix I see and hope my hubby gets the message before Christmas.) Anyway, I love my little immersion blender.
It made short work of both pots of pumpkin puree. Here's where I part ways with Ben. I just couldn't deal with the mess of the whole towel process to remove the excess water. So I spread my puree into two cookie sheets with inch-high sides on them,
and popped them back in the 350 degree oven until most of the water evaporated. Now, what to do with all this pumpkin? I saved out about three cups to make a variation of Ben's Curried Pumpkin Soup, but that left about twelve cups still to store. I measured the puree out into 2-cup servings. I know, I suck for using plastic baggies, but I just don't have room in the freezer for bulky storage containers. I'm trying to make up for it elsewhere in my kitchen! To prevent a total mess in getting your puree into baggies, I recommend that you put a baggie into a bowl and use a wide-mouth funnel for pouring (I use my canning funnel).
It works great. I did not picture the first bag I attempted with no tools. Let's just say that Colonel was really happy licking up the pumpkin puree that went all over the floor. But, in the end, I came out with a very respectable bunch of pumpkin to use that will last me through the holiday season!

Don't forget to label your baggies before you pour product in them! Home cooking is all fun and games until you wind up with a bunch of mystery crap in your freezer. What am I going to do with all this pumpkin, you might ask? I thought I would troll around and provide you with links to the recipes I'm dying to try. It may wind up sounding a bit like Forrest Gump, however.

This Pumpkin Ice Cream looks amazing, as do Pumpkin Whoopie Pies.

I found an entire blog dedicated to pumpkin, complete with dog treats! Find The Pumpkinista here.

Now go get those terrible-looking pumpkins off your porches, cut off the carved part, and cook them up! Now you can make pumpkin goodies all season long without using the processed, canned stuff. What are your favorite pumpkin recipes?

UPDATE: This puree makes the best pumpkin pies in the world. Don't be afraid to sub this in for the canned.